MD Building Products 8086 32 pollici Deluxe soglia bassa con guarnizione in vinile 32" L x 3-3/4" W x3/4" H

Brand:M-D Building Products

3.4/5

45.61

DESCRIZIONE PRODOTTO Serie AP334. Soglia bassa premium con guarnizione in vinile. Sigilla le correnti d'aria dal fondo della porta. Viti fornite. 3 3 4'' W. x 3 4'' H. N. 08086: 32'' di lunghezza, finitura alluminio standard N. 08102: 36'' di lunghezza, finitura alluminio standard N. 49004: 36'' di lunghezza, finitura nichel premium N. 09043: 36'' di lunghezza, finitura oro premium DAL PRODUTTORE Soglia modello Deluxe con guarnizione in vinile incorporata. Il robusto design in alluminio e vinile assicura anni di protezione dagli elementi. L'installazione di una soglia aiuterà a sigillare le correnti d'aria dal fondo della porta. Si consiglia di utilizzare uno spazzaneve con questa soglia per fornire la migliore tenuta stagna. Aiuta a rendere la tua casa più confortevole e a risparmiare energia.

Le strisce in vinile sulla base forniscono una tenuta stagna contro il pavimento. Protezione per tutte le stagioni contro correnti d'aria, umidità, polvere e insetti. Finitura in alluminio. Sigilla fessure alte fino a 5/8 di pollice tra la parte inferiore della porta e il pavimento. Adatto a porte larghe fino a 32 pollici.
Batteries Included? ‎No
Batteries Required? ‎No
Brand M-D Building Products
Color Aluminum
Color ‎Aluminum
Country of Origin ‎China
Customer Reviews 4.3 4.3 out of 5 stars 575 ratings 4.3 out of 5 stars
Domestic Shipping Item can be shipped within U.S.
Included Components ‎Hardware;Door, Gate & Window Hardware;door-thresholds
International Shipping This item can be shipped to select countries outside of the U.S. Learn More
Is Discontinued By Manufacturer ‎No
Item Dimensions LxWxH 32.5 x 3.75 x 0.62 inches
Item model number ‎08086
Item Package Quantity ‎1
Item Weight ‎1.61 pounds
Manufacturer ‎M-D Building Products
Material Vinyl, Aluminum
Material ‎Vinyl, Aluminum
Part Number ‎08086
Product Dimensions ‎32.5 x 3.75 x 0.62 inches
Size ‎32" L x 3-3/4" W x3/4" H

3.4

11 Review
5 Star
65
4 Star
17
3 Star
10
2 Star
3
1 Star
6

Scrivi la tua recensione

La tua mail non sarà pubblicata. Tutti i campi obbligatori sono segnati con*

Scritto da: Kage
If you enjoy a challenge...
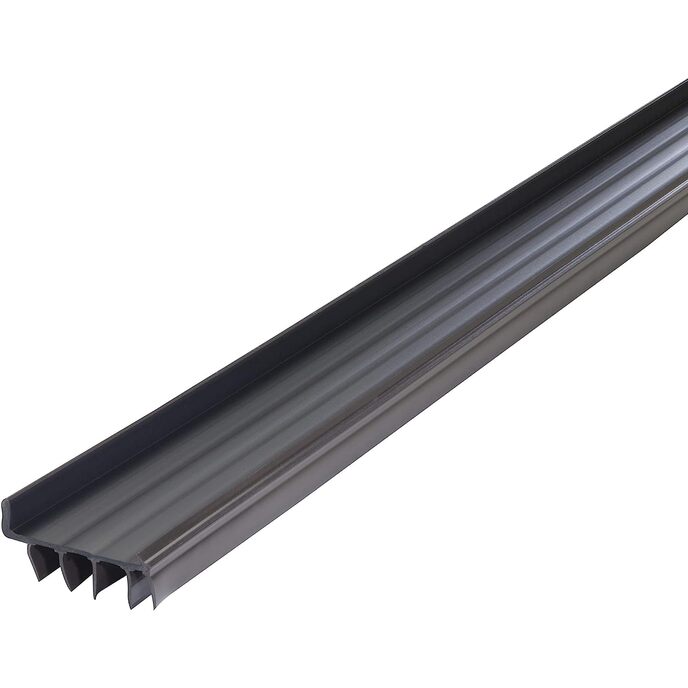
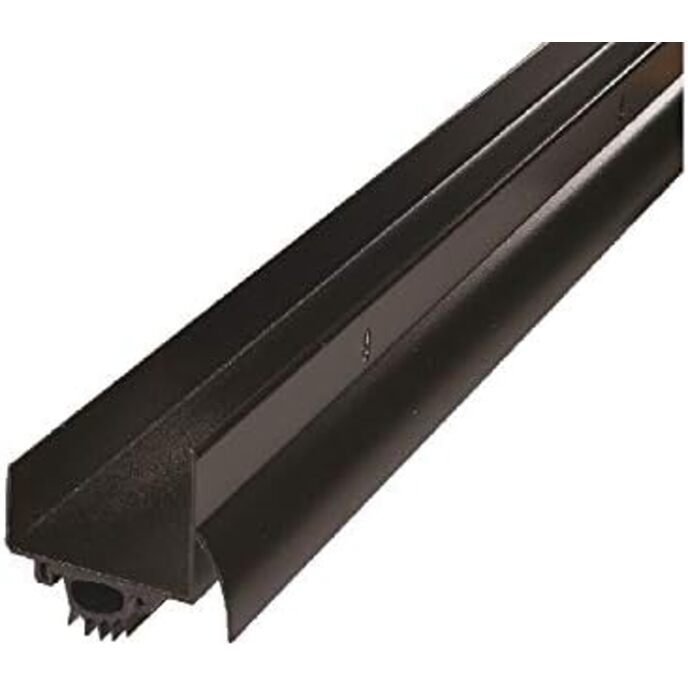
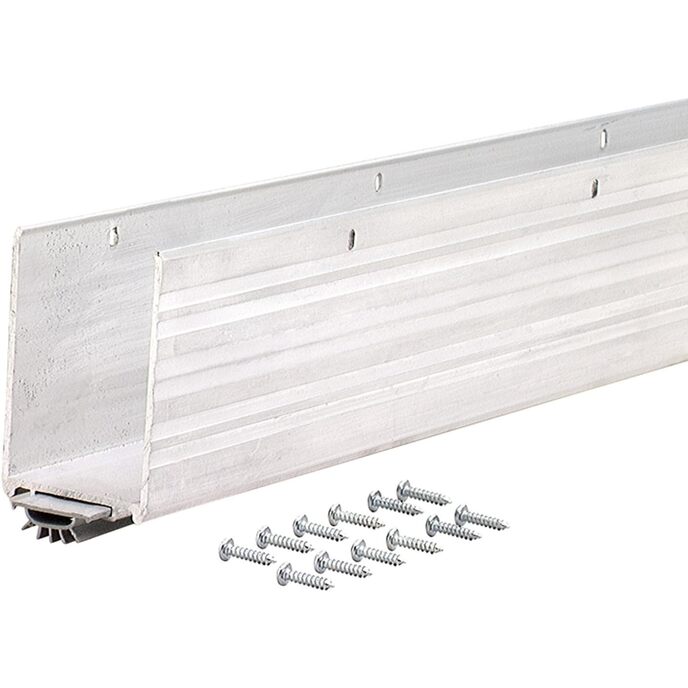
It's in. And it works. That being said, it's a long road to getting there. My old threshold lost its gasket and was scruffy and dented, and also had screws in front of the gasket toward the outside. The M-D has hidden screws under the gasket. I unscrewed the old one, banged it out from its long standing spot and then lined up the new one. It looked like it was the perfect length, so I banged that into place (a tight fit under the trim boards, but so was the old one). Looking good so far. I drilled 3 pilot holes into the cement using the 3 holes in the threshold, then banged it out again so I could drill the 3 holes and insert anchors for the provided screws. I used a fresh, new cement bit and created holes for my anchors and deep enough for the included screws. Of course before going to such lengths I thought let's just test out the gasket installation since so many had problems. I tested it while it was uninstalled, merely squeezing an end of the gasket into the very tight channels on the threshold. At first it didn't seat properly. Then I made more of an archway in the rubber to get the edges lined up better in the grooves. That worked... again, still only a practice run. I thought, okay, it seems to line up, all I need to to is bang the metal back into place, screw it into my new holes, and then fit the gasket in and I'm good to go with my newly trimmed door resting snugly against the rubber. Perhaps you can guess this didn't go easily. When the threshold is screwed to the floor it's like there's a structural change or something that takes place. The gasket becomes nearly impossible to get fitted into the channels. But with the help of a few tools, soap, and great PATIENCE after swearing like a proverbial sailor, I managed. Here's how: 1. keep the gasket warm until ready to install 2.while still in the warm place, work the rubber into an arched position since it doesn't want to naturally bend that way. It ships flat. Do the whole length and then really work the 1st 6" or a foot 3.pump some liquid soap into the channels of the threshold and also soap the starter end of the gasket, the one you just exercised into shape. Don't be afraid to use a lot of soap in the channels or on the gasket. If it's installed correctly the only way the gasket is coming out is to rip it out. 4.Try to keep the length of rubber aligned with the channels. At the threshold, using the now exercised end of the gasket, form an arch and push the very tips into the front and back channels. Start them close to the door jamb. Test to see if they're seated by gently prying on the end of the gasket on each channel. If they hold, they're in. Now slide the installed tips against the door jamb if they're not already there. 5.Here's where reading the instructions comes in handy. It says to push downward along the gasket toward the other end (or something like that). That does actually work, but instead I had spent a lot of time - I'm embarrassed to say how much time - trying to force the rubber into the channel using a variety of flat edge tools. However, pushing only works if you have enough rubber seated into the channel. I had about 4" seated when I was able to successfully push (hard!) with one hand while trying to keep an arch in the rubber and line it up with the channels ahead of the push. The soap comes in handy here since it allows your push hand to slide as you push. I had to push hard with the heel of my palm making sure to contact both edges of the gasket to engage the channels at the same time. Continue down the length of the gasket, checking as you go by attempting to gently lift the pushed edge out of the channel. If it stays in, keep going. It can be deceiving, looking like it's seated but it's not. Note: I was not able to push one side 1st and then the other which would have made sense. I think it only works to push down on center and both sides evenly as you go due to the way the edges align with the channels at the same time. So after a very frustrating time, it works quite well. I feel no cold air at the bottom of the door, only on the sides where a simple gasket will suffice. Moral of the story: lose the threshold completely and use a door sweep.
Scritto da: Matthew Kyle
Exactly as ordered!
Was easy to install if you follow instructions.
Scritto da: MichaelP
Worked great
Cut to fit and installed in just a few minutes. Exactly what I expected. Rubber can be tricky to insert but just start at one end and it'll go.
Scritto da: Cinderellapumpkin
Great product
This threshold is made of high quality materials. I installed it for an inside garage door that leaked cold air at the bottom. It went in well and looks nice. I am very happy with this item.
Scritto da: Gary Sparks
Good product
Fit perfectly!
Scritto da: Eric
Proper fit if you have the right clearance
Could be very easy to install with right tools. My door sagged 1/4 inch and I could not get the door closed with this installed. I need to fix the door first and then I am sure I will get the proper fit. The rubber insert will be super easy to install with silicon spray. A masonry bit and the hammer drill will make drilling into concrete a piece of cake.
Scritto da: Curt M.
Good product
Strong and durable good product
Scritto da: dori
Must warm vinyl during install if it’s cold outside
After delivery issues (driver was afraid to come up my rural, long driveway in snow & package was dumped in snowbank near bottom of my hill ????) I attempted to install. I wish I had read reviews 1st (my bad) the vinyl was impossible to install as it’s 25 degrees outside & no amount of prewarming kept it soft enough to bend well to get fully in the channel. What worked for me was using my hairdryer on high heat & laying it on the floor along the threshold-that did the trick. It slipped in easily once warm ????
Scritto da: Elle Kaye
Looks like a quality product - just not the right size for my door
Can't really comment as I never used it
Scritto da: Mamasita@17
Best garage Vinyl seal
My husband bought this to seal his garage area and it works very well from rain not getting into his garage.Best product and looks great as well.Very easy to install and cut to size.
Scritto da: dominic gemmiti
Difficult to fit vinyl
Fitting of vinyl should be reviewed, the profile is not the best for the aluminum base

Prodotti correlati

Scopri il nostro network internazionale

Spediamo in 28 paesi, oltre 200.000 prodotti. Resta aggiornato, iscriviti alla newsletter.

Shopping Cart