Litex WCI-100 Wall Command Controllo universale per ventilatore da soffitto, tre velocità e dimmer a gamma completa, nero, 10.20x8.00x3.50

Brand:Litex

3.4/5

94.32

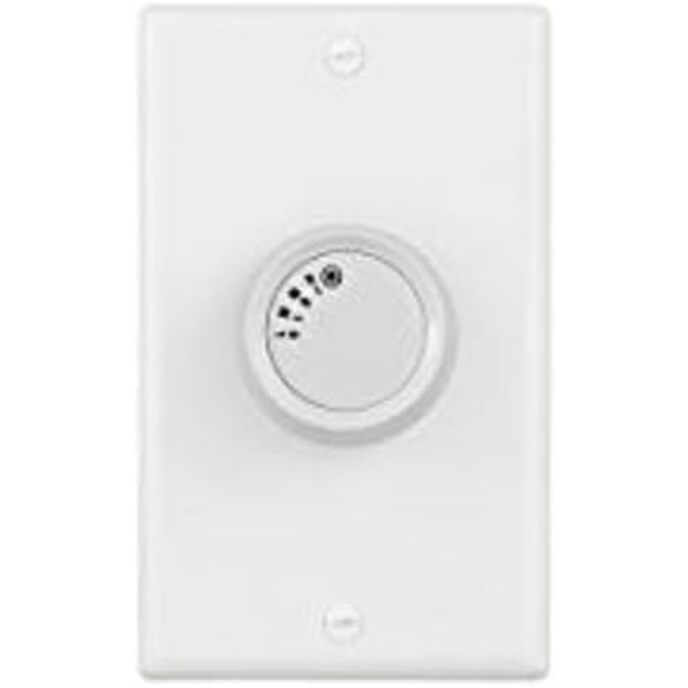
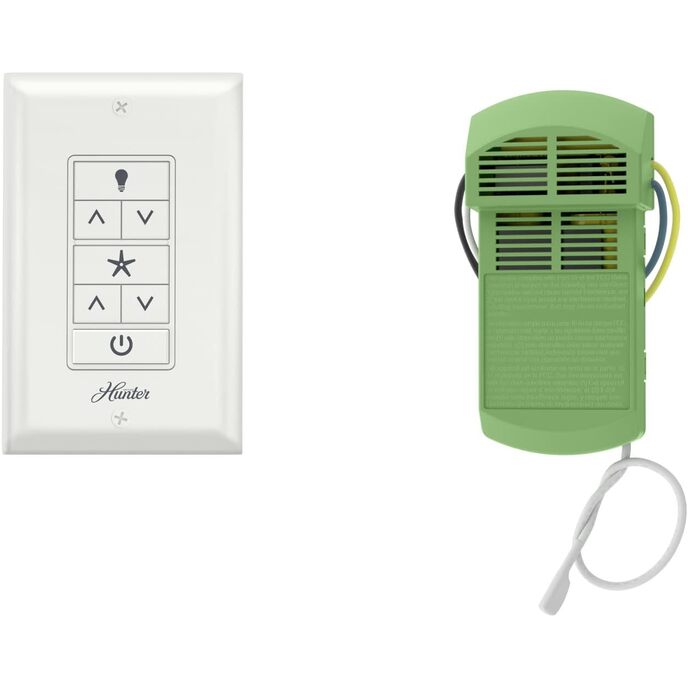
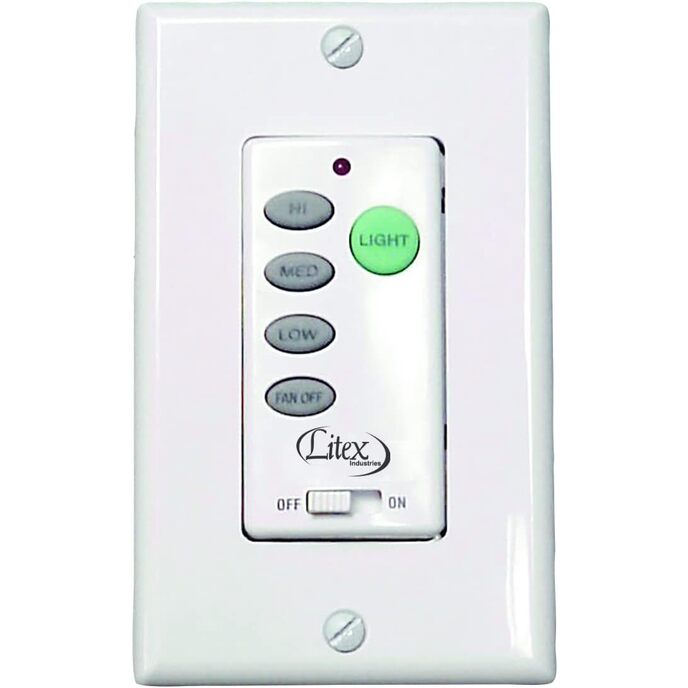
Litex Industries - Litex WCI-100 Comando a parete Controllo universale del ventilatore da soffitto, tre velocità e dimmer a gamma completa - Quando si installa un Litex o qualsiasi altro ventilatore e si ha bisogno di un'unità di controllo a parete facile da installare. Il comando a parete Litex WCI-100 consente di modificare la velocità della ventola (alta, media, bassa), regolare l'illuminazione con un dimmer luminoso a gamma completa. Durante l'installazione, questo utilizzerà i 2 cavi esistenti (cavi fissi) già nella parete dove è presente l'interruttore della luce esistente. Questo controllo a parete ha un pulsante di accensione/spegnimento istantaneo. Il controllo a parete funzionerà con tutti i ventilatori a stelo da 42" e 70" o con posizioni a filo oa volta. Questo controllo non comporta un'opzione inversa. Include anche una garanzia limitata di 1 anno. Litex Industries "Ingegnerizzato per l'eccellenza"

1 anno di garanzia limitata. Installazione semplice: unità a parete (sostituzione a 2 fili) e ricevitore. Funziona con ventole montate su asta in basso, posizioni montate a filo e a volta. Il pulsante dimmer della luce a gamma completa controlla la luminosità della luce. Controlla 3 velocità (alta/media/bassa) - più pulsante di spegnimento istantaneo.
Batteries Included? ‎No
Batteries Required? ‎No
Brand Litex
Brand ‎Litex
Certification ‎UL Listed
Collection Name ‎Remote Controls
Color Black
Color ‎Black
Controller Type Button Control
Controller Type ‎Button Control
Country of Origin ‎China
Customer Reviews 4.4 4.4 out of 5 stars 518 ratings 4.4 out of 5 stars
Domestic Shipping Item can be shipped within U.S.
Finish ‎White
Finish Type ‎White
Included Components ‎Remote and instruction
International Shipping This item can be shipped to select countries outside of the U.S. Learn More
Is Discontinued By Manufacturer ‎No
Item model number ‎WCI-100
Item Package Quantity ‎1
Item Weight ‎11.3 ounces
Manufacturer ‎Litex
Material Plastic
Material ‎Plastic
Measurement System ‎English/Standard
Model Name ‎Litex WCI-100 Wall Command Universal Ceiling Fan Control, Three Speeds and Full Range Dimmer
Mounting Type Protruding
Mounting Type ‎Protruding
Number Of Pieces ‎1
Number of Speeds 3
Number of Speeds ‎3
Part Number ‎WCI-100
Plug Format ‎A- US style
Power Source Corded Electric
Power Source ‎Corded Electric
Product Dimensions 4"D x 8"W x 10"H
Product Dimensions ‎4"D x 8"W x 10"H
Product Dimensions ‎8 x 4 x 10 inches
Size ‎10.20x8.00x3.50
Special Feature Dimmable
Special Feature ‎Dimmable
Special Features ‎Dimmable
Style Modern
Style ‎Modern
Switch Style ‎Dimmer Switch
Usage ‎Ceiling fan
Voltage ‎120 Volts
Warranty Description ‎1 year warranty. Contact customer service at 800-527-1292 for parts or warranty details.

3.4

6 Review
5 Star
71
4 Star
13
3 Star
5
2 Star
4
1 Star
6

Scrivi la tua recensione

La tua mail non sarà pubblicata. Tutti i campi obbligatori sono segnati con*

Scritto da: Jerry
This wall unit is compatible with older non-learning models
I had one of the older wall units (model UC-9050) that looks just like this one but was made by Harbor Breeze. It worked flawlessly for the past 17 years but the off button had to be pressed really hard to turn off the fan from the wall unit. So I sought to replace it with like for like but there were a number of reviews out there made it difficult to determine if would still work due to the learning function of the receiver. Bottom line, just set the first 4 dip switches to match and the fifth dip to off or 'X'. Unfortunately, the instructions and the manufactures specs don't let you know if it's backwards compatible which is unfortunately as I've seen a number of reviews stating they returned it. That said, there was a review posted on her by Jason Allen on in March of 2014 that really help explain the whole deal. I'm re-posting his review in the hopes it helps others who don't go through all 100+ reviews to find it. You can also find his review in the Q&A if you search for 'frequency'. Here it is again: ByJason Allenon March 28, 2014 This is in respsonse to some people that said it didn't work with an old receiver: I currently have three Hampton Bay fans and one Harbor breeze fan. One Hampton Bay fan is on a 20 ft vaulted ceiling and came with a remote control. Over the years the Hampton Bay remote light button was wearing out but was still working. The Harbor Breeze fan came with a remote kit (receiver and remote) that I didn't install. I saved it thinking I could put it in the master bedroom Hampton Bay fan. Well, I never got around to installing the new remote kit so instead I thought why wouldn't this new remote replace the old Hampton Bay remote. I opened up both remotes' battery compartments and set the new remote's dip switches the same way as the Hampton's and the new remote worked. Then some months later while walking down the ceiling fan aisle at Walmart, I saw a "universal" remote kit. The kit's remote looked exactly like the Harbor Breeze remote except it didn't have any branding logos on it. On a hunch that it was exactly the same remote I bought it. Comparing the "universal" remote and the Harbor remote I found that they had the same FCC ID, which is KUJCE9103; that meant that they were the same frequency. Looking at the old Hampton Bay remote revealed that it was L3HMAY97FANHD. Also looking at a new Harbor breeze in-wall transmitter I installed most recently was CHQ9051T. Summary of different remotes I have used: 1. Hampton Bay Remote (1997) FCC ID: L3HMAY97FANHD, 303.95 MHz Four dip switches 2. Harbor Breeze remote (2002) FCC ID: KUJCE9103, 304 MHz Four dip switches 3. Generic Remote (2002) FCC ID: KUJCE9103, 304 MHz Four dip switches 4. Harbor Breeze in-wall remote (2008) FCC ID: CHQ9051T, 303.875 MHz Five dip switches I've gotten all of these "different" remotes to operate the fans without changing out the receivers in the fans. The receivers must have a wide enough tolerance or bandwidth to accept the slight frequency differences from the transmitters. I'm guessing it is 0.200 MHz and could go up as much a 1Mhz. I've gotten a 304 MHz remote to work with a 303.95 MHz receiver and a 303.875 MHz remote to work with a 304 MHz receiver. The only issue with a remote that is on the edge of the bandwidth would be decreased range; so if the remote was designed to work at 40ft, it might only work at 20ft. Steps for finding a replacement remote: 1. If you have a different remote (different FCC ID) go to google and do a search for "FCC ID lookup" and go to the FCC website to do a lookup. The first three characters of the ID are the grantee code and the rest of the ID is the product code. The main point of this step is find out the frequency. 2. Once you have the frequency compare it other remotes available. If you find one that is within plus or minus 0.2 MHz it will probably work. 3. There's one more very important thing to check on you old remote. Find out how many dip switches it has. 4. Places to buy the remote: Walmart, Lowes, Amazon, Ebay Another thing I've seen on other DIY or handyman websites is that they say changing the dip switches will change the frequency. That is not what it is doing. Changing the dip switches changes the address lines of the HT-12E RF encoder. Multiple remotes of the same model in your house all operate on the same frequency but it is the unique encoding set by the address bits of each transmitter/receiver pair that pairs them up to control only one fan. A button push on one remote will be received by all the fans but will be ignored by the fans that are not paired up. The latest models of remote are "Learning" or "Smart". One, I read about was Honeywell Smart Sync in-wall remote (2011) FCC ID:KUJCE10005, 304 MHz No dip switches. The FCC's website shows that it operates at 304Mhz. That matches up with Harbor Breezes remotes. Unfortunately Honeywell and others are moving toward a Smart Sync or Learning process. That process removes flexibility from the home owner and forces you to replace the fan receiver if the receiver is not Learning. If the Honeywell remote had the traditional/older style dip switches you match up the Honeywell remote with your older Harbor Breeze receiver by matching the dip switch setting. If the Honeywell remote has the HT12E encoder, you could open up the remote and find the address lines on the HT12E and set them high, connect to Vcc, or low, connect them to GND, to match the dip switches. That's all the dip switches do is set the address lines on the encoder. The receivers get matched up when their address lines are the same. I was able to install a Harbor Breeze in-wall remote that had similar Learning instructions but the learning was all at the receiver side and the remote had dip switches making it backwards compatible with older receivers. FAQ: Q: Is a five dip switch transmitter compatible with an already installed four dip switch receiver? A: It depends. Follow the steps above to verify frequency. If the frequency looks good then on the five dip switch transmitter set the fifth switch to "off "or "low". In my case the fifth dip switch was labelled "D" (on) and "X" (off). I set mine to "X". Ignore whatever the instruction says about it being used to turn on dimming for incandescent/florescent lights. Q: Can a transmitter/receiver pair that's labelled learning or has instructions claiming "learning mode" work with already installed receiver? A: It depends. Follow the steps above to verify frequency. If the frequency looks good then check to see if the transmitter has dip switches. In my case, my transmitter had dip switches and the learning was all in the new receiver. I didn't use the new receiver and was able to use the already installed receiver by matching up the dip switches. Q: Can two or more remotes be used to control one fan? A: Yes! That's what is nice about having remotes and in-wall remotes that have dip switches. Just set the dip switches on all the remotes (hand-held or in-wall) to match fan receiver. I am successfully using an in-wall remote near the door that is installed in a switch gang box and a hand-held remote on the night stand to control one fan in the master bedroom. If you have "learning" or "smart-sync" transmitter/receiver setup it might not work.
Scritto da: J. Fix
Great replacement for the junky A23 battery eater remotes!
This wall switch replacement for the cheap remote controls that the ceiling fan manufacturers supply works like a CHAMP. It completely removes the battery element from the equation, so your connectivity never drops to your fan and you can control all functions from the wall (fan speed, dimmable lighting). My only complaint about the unit is that the remote that installs in the fan mount is just *slightly* bigger than the remote unit that was in my fan. I had to take down the entire fan and modify the "ball" support from the fan stem to shorten it, to provide room for the new remote unit to slide in. Once I did that, the remote unit fit and the thing works great.
Scritto da: BRW
Works well
I needed to replace my original and this is an exact replacement. Very satisfied.
Scritto da: Tova-Jesse
I was successful in replacing my 3-way switches with these (needed to order 3 kits). Works great!!
At the top of my stairway to my second floor I had a plain light fixture that was served by 3-way switches (one at the bottom of the stairs, one at the top of the stairs, and one just outside the Master Bedroom). I decided to replace the light fixture with a fan/light combination to improve air circulation between floors. I didn't want to have to control both fan and light with these 3 way switches so I decided to see if these would work...and they do!! It was a bummer to need to order 3 complete kits because I needed 3 transmitters but 1 receiver, but the experiment worked and I have extra receivers. What's nice about these kits is that the receiver doesn't have DIP switches on them- you set the transmitter(s) to whatever code you choose (make sure you set them all to the same code). It's also cool that you don't need to tap into the white wire in the switch box, just connect the transmitter to each of the black wires in the box, doesn't matter which is which, and connect the ground wire to ground of the switch box. First I switched off the circuit breaker powering that circuit. Next I removed all of the existing wall switches and then disconnected the red wire from each and insulated them with the wire nuts (these are no longer needed and will not have power to them so just make sure they can't short out other wires in the wall). Next I installed the receiver inside the ceiling fan base- black from ceiling to black incoming, white in ceiling to white incoming, then to the fan black-black, white-white, & blue-blue...pretty simple. Next I connected one of the transmitters to each black wire in the switch box: black-black & black-black, green-bare copper in the switch box. This next step required me to move quickly to complete- I turned the circuit breaker on, then I needed to run upstairs to the transmitter and hold the Fan Off button on the transmitter for 3 seconds. The lamp turned on and flashed twice, which meant the receiver successfully paired to the transmitter. I was able to control the light on'off and fan speed with the transmitter now. Since the other 2 transmitters were set to the same code all I needed to do was flip off the circuit breaker and wire up the 2 remaining transmitters the same way as the first- no extra programming step was involved. Once I returned power to that circuit I was able to control both light and fan from the 3 locations! I'm very happy with the result!
Scritto da: Ilo O. Kratins
Not really white
Works fine, dims the light and controls the fan, instructions are instructive. My gripe is that the plastic is not the same color as every other white plastic electrical unit ever produced, not even the same color as the included cover plate. That's just kind of dumb, sloppy production; hard to know why they don't do better.
Scritto da: Sal
These work great
I had three of these installed in the house by the previous owner. I put up a new ceiling fan in a spare bedroom. The pull chains were not going to work as it was installed directly over the bed. I made sure I had a unique code set on the dip switches and the receiver module automatically sets up by holding the fan off button once power is restored. The toughest part of the install was getting all of those wires and the receiver into the housing of the fan. You also have to make sure the fan is set to the fastest speed via the pull chain and the lights are on. The control will handle it after that.

Prodotti correlati

hot
Comandi Fanimation WC1WH, bianco
2.9/5

€ 97.84

Comandi Fanimation WC1WH, bianco
2.9/5

€ 97.84

Scopri il nostro network internazionale

Spediamo in 28 paesi, oltre 200.000 prodotti. Resta aggiornato, iscriviti alla newsletter.

Shopping Cart