Kit soluzione Gates 38379K

Brand:Gates

3.6/5

220.93

Gates, il progettista più esperto al mondo di sistemi di trasmissione a cinghia per accessori e produttore di componenti di alta qualità, ha creato kit di soluzioni progettati con precisione per semplificare la manutenzione delle trasmissioni per accessori front-end. Dal salto della cinghia al rumore cronico della cinghia, offriamo una linea di soluzioni appositamente progettate per migliorare i progetti di trasmissione dell'equipaggiamento originale in modo che i veicoli dei clienti siano migliori di quando hanno lasciato lo showroom. Noi di Gates sappiamo di cosa hai bisogno per rendere felici i tuoi clienti.

Vedere il catalogo delle applicazioni on-line di Gates per soluzioni specifiche per veicoli. Cinghia scanalata inclusa con struttura in EPDM premium, relativi tenditori e tenditori. Ampia copertura del veicolo. Progettato per risolvere problemi di progettazione OEM o unità problematiche.
Brand ‎Gates
Customer Reviews 4.5 4.5 out of 5 stars 407 ratings 4.5 out of 5 stars
Exterior ‎Machined
Item model number ‎38379K
Item Weight ‎2.8 pounds
Manufacturer ‎Gates
Manufacturer Part Number ‎38379K
Model ‎Solution Kit
OEM Part Number ‎38379K

3.6

4 Review
5 Star
77
4 Star
9
3 Star
7
2 Star
2
1 Star
5

Scrivi la tua recensione

La tua mail non sarà pubblicata. Tutti i campi obbligatori sono segnati con*

Scritto da: family8
The belt was a challenge to install
After installing the tensioner and idler pulley, I met quite a challenge installing the belt. I almost resorted to purchasing the optional smaller idler pulley (part #38008) which is 70mm O.C.vs. the one supplied in the kit (38009) which is 76mm O.C. The following are the steps I took to install the new serpentine belt: I jacked up the right side of the car at the recommended jacking point and installed a jack stand for safety. Using the belt routing diagram as a guide, I wrapped the belt around everything except the water pump pulley, which is smooth. With my finger, I spread the tiniest amount of dish soap on the areas that the belt needed to slide over; (I wiped this off after installation) I moved the splash shield from the right wheel well out of the way by removing 3 plastic fasteners; this enabled me to handle the belt from underneath. I installed a plastic mini clamp to hold the belt onto the crankshaft Using a long 15mm wrench and 1/2 inch breaker bar, I had a second person pull the tensioner open all the way I was initially unsuccessful until I realized I needed to remove the clamp while holding the belt, so that I could reposition the belt to get the V Ribs to settle in the proper channels of the crank pulley; this tiny detail made a difference. I then pushed the belt with all my strength to get it over the smooth pulley; It took a lot of effort, but I was able to just barely slip it on.
Scritto da: J. Delahanty
Excellent Solution - Installation Tips
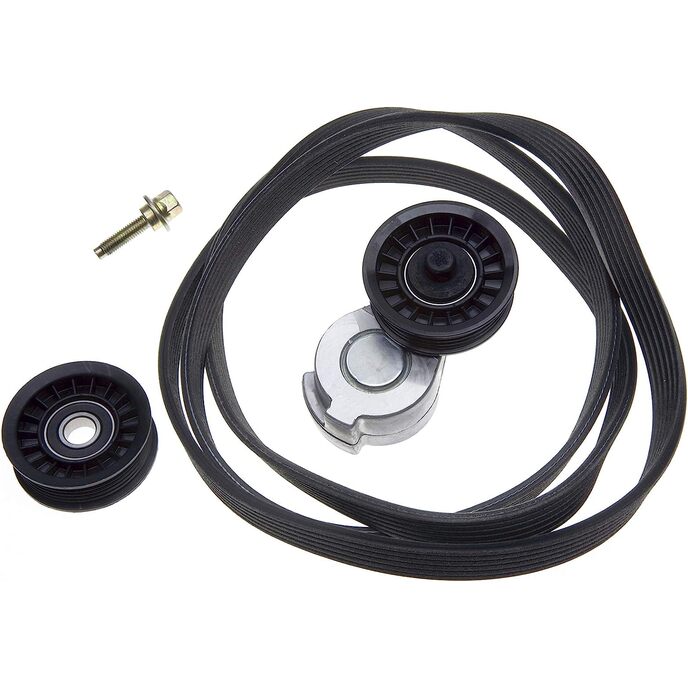
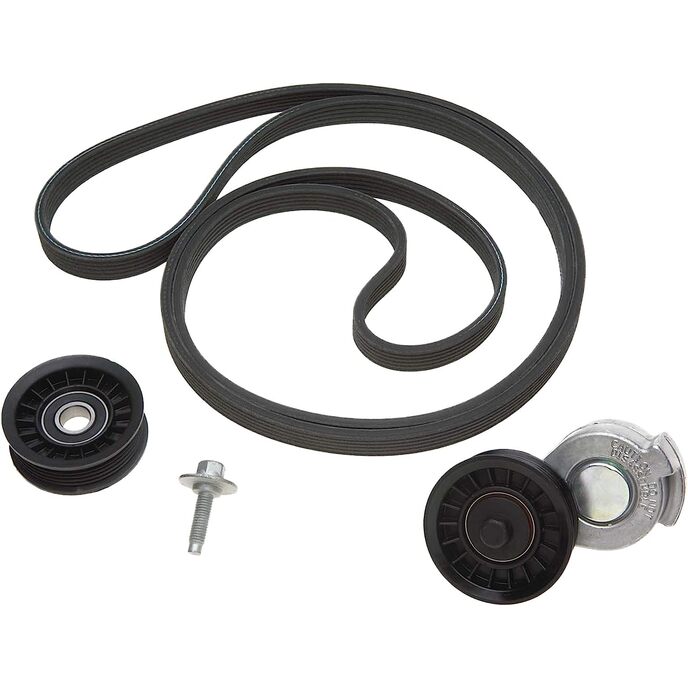
We noticed that our tensioner has been angling out for years, and the squeaking was getting very tiresome. We had never had the belt slip off before three weeks ago, but it did so in the rain, and I had to fix it by the side of the road. Enter the Gates 38379K Serpentine Belt Kit. This kit is THE solution to serpentine belts slipping off the pulleys. Earlier reviews speak of the problem, I can assure you that this kit is the solution. No squeaking, no misalignment of the tension pulley, just quiet operation. I can't believe what a difference this kit makes. I was hesitant to do the work myself, but was able to track down information, here and on the net, and do it in a few hours. I thought I'd post the info for the next guy. The hardest part, bar none, is removing/installing the tensioner and tension pulley. The second hardest part is installing the new belt. The third most difficult? Believing the difference. It's unreal how much better this works! Remove the tensioner as follows: * After disconnecting the negative battery cable and removing the serpentine belt* 1. Remove the windshield wiper tray. On an 1999 model, remove the two wipers (16mm nuts), 6 torx screws and remove the top piece. Four 13mm nuts and 6 13mm bolts inside the tray. Be sure to disconnect the electrics on the right side, the two drains, and the spray line on the left. You now have plenty of room to... 2. Remove the alternator/bracket. First, remove the 15mm and two 14mm bolts from the triangle shaped accessory bracket. Remove the top 15mm bolt from the alternator and loosen the bottom 15mm bolt. Push the alternator to the rear to access the nut for the bottom alternator bolt. The positive cable for the alternator is attached with a 10mm nut...be careful not to lose it. You don't have to remove the alternator, just position it away from... 3. The rear nut for the tensioner. This is a bear. If you look down into the small space you have created by moving the alternator, you will glimpse the shy 15mm nut that is holding the tensioner. IF you have a thin enough 15mm box end wrench, you might be able to get it around the nut. Otherwise, use an open end wrench to loosen, then your finger to spin the nut off. Be careful, and have a magnet handy for the dropped nut. Luckily, there isn't much room below the nut, so it usually falls on the power steering unit. Still, unless you have very small hands and long fingers, you'll need the magnet. Installation: The new tensioner mounts fairly easily, but getting the nut on the bolt takes some patience. I needed a piece of thin cardboard cut to hold the nut in place, place the nut down in the space and spin the tensioner to catch the nut. Once caught, position the tensioner, spin the nut on with your finger and tighten it with the wrench. Remove the idler pulley with a 15mm wrench, and save the bolt and insert. The bolt in the kit was too long for my car (1999), so I reused the bolt and insert on the new idler pulley. You can not use a socket on this. Once you have the tensioner and pulley in place, reinstall the alternator and bracket. The belt is very tight to install, but it can be done with a helper: One pulls the tensioner down, one pulls the belt around the air conditioning pulley, spinning the pulley while guiding the belt around. (Tip: If you've removed the rain shield from the underside of the engine, you can use the old belt to pull a 15mm wrench on the tensioner by looping it around and stepping on it.) You'll have to get the tensioner all the way down to install the belt! Eyeball the belt to see that it's on all the pulleys, if so, start the car and check. Lovely sound, isn't it? No squeal! Install the tray in the reverse of removal. Don't forget the drains and the squirt tube! When you're finished, be sure to put the sticker from the kit next to the belt diagram, so you can remember the belt size when you have to replace it in 10 years :^) My wife can't believe the difference, and neither can I. My neighbors no longer wear ear protection when we back out of the driveway! It's like a stealth car! Honestly, this is a great piece of kit, and I recommend it to anyone with a defective serpentine belt system.
Scritto da: cyberfogey
Gates 38379K a real problem solver!
Gates 38379K Enhancement Component Kit This kit was well worth the money so far. My son lives in Gilbert, Arizona and we installed this kit a few weeks ago. The car has made it through a recent monsoon (you probably saw it on your local news)and another day of rain with no belt problem at all. The belt used to fall off with the least amount of water on the road. This is a ridiculously inherent problem for both Dodge and Chrysler vans and shame on Chrysler for not correcting this issue through a much needed recall! (But I digress!) You can easily remove the idler pulley bolt from under the hood of the vehicle. It requires a 15 mm metric wrench. The bolt holding the belt tensioner pulley was easily accessed from below the vehicle. You don't have to mess with the alternator or disassemble the wind shield wipers trays, etc! It is always a good idea to disconnect the negative battery cable whenever you work on a car. We jacked the car up and the plastic guard had already been removed by the previous owner, probably due to the same belt issue! If you can change an oil filter you can install this after market product in about an hour and a half. I will admit that I have had to perform more than my fair share of vehicular surgery since I had 2 teenage boys who drove cars and I am pretty cheap, but I am not a car mechanic by any means! You will need a 15 to 18 inch extension with a 15 mm metric socket. Use a breaker bar because the nut is pretty tight. Getting the nut back in place will take a few tries because there isn't a whole lot of room to manuever but it can be done. You will need a helper on top under the hood to help hold the idler/tensioner pulley piece in place as you tighten the nut back on. Buy some hand cleaner because you will get very dirty and greasy arms...possibly need a new shirt! All in all not too difficult of a project especially considering it was 111 degrees that day! (His vehicle is a 2000 Plymouth Voyager with a 3.3 liter engine and air conditioning.) I don't know what the problem was with getting the belt to go on as indicated from some of the other reviews. This kind of spooked me at first but it really was no problem at all. I did take the advice from one of the other reviews I have read. When we replaced the belt from 3 previous times it fell off and was ultimately chewed to oblivion, we would place the belt on the idler pulley last. Since the kit has a belt that is ribbed on both sides and the tensioner and idler pulley are now grooved this is made more difficult. So we placed the belt on the air conditioning pulley last since it is still smooth and the belt was easily pulled onto it with the help of a flat screwdriver from under the car. My son had to hold a wrench on the tensioner pulley to loosen the tension until the belt was on. I know the belt on the 3.0 liter engine is smaller than the one on a 3.3 liter engine so some of the reviewers may have ordered the wrong kit (38342K for 3.0)or possibly the wrong belt was put in by mistake at the manufacturers. At any rate it was fairly straight forward for us. Good Luck!
Scritto da: Mine
Five Stars
Worked really well. No more belt slippage or noise issues

Prodotti correlati

Scopri il nostro network internazionale

Spediamo in 28 paesi, oltre 200.000 prodotti. Resta aggiornato, iscriviti alla newsletter.

Shopping Cart