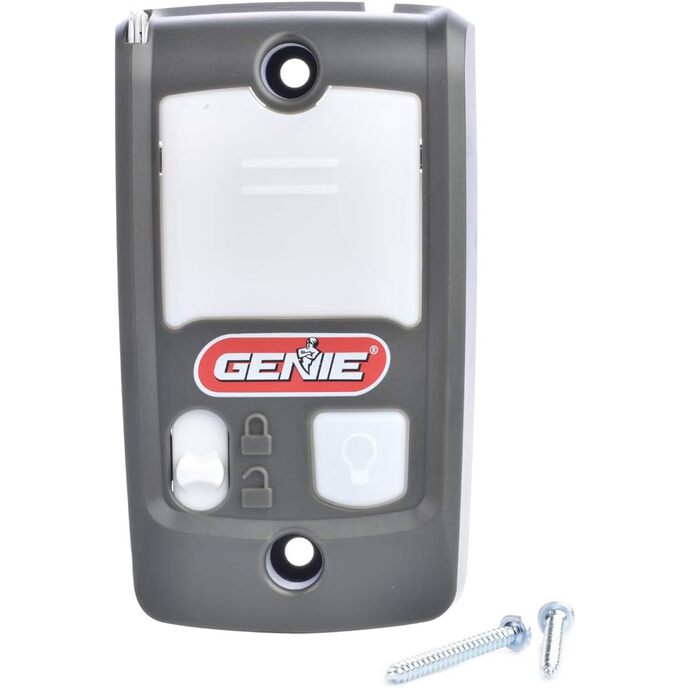
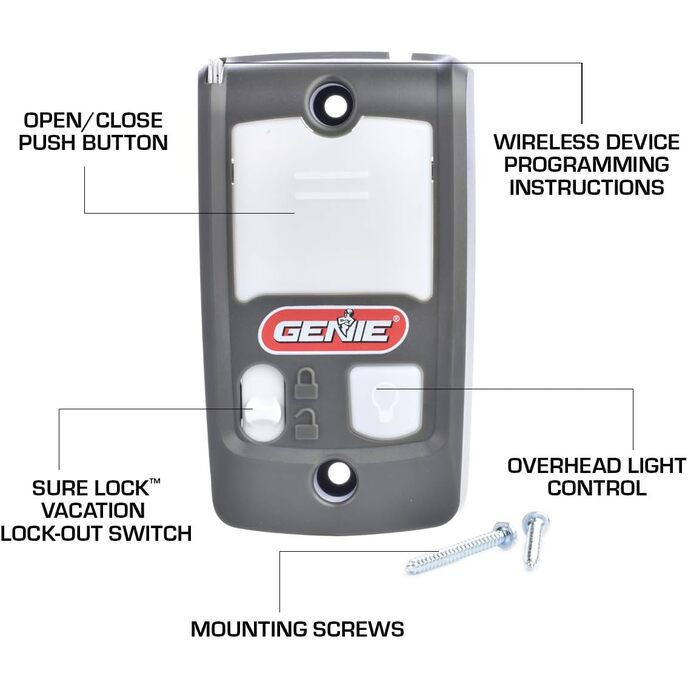
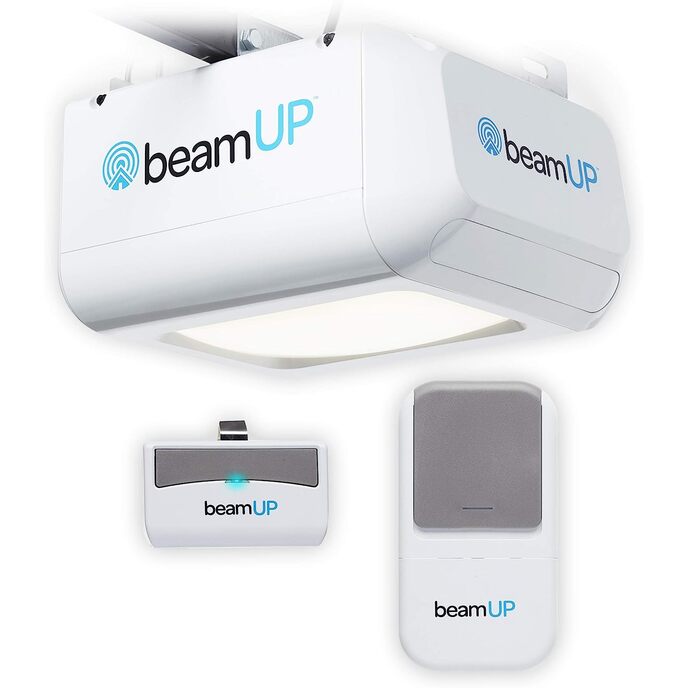
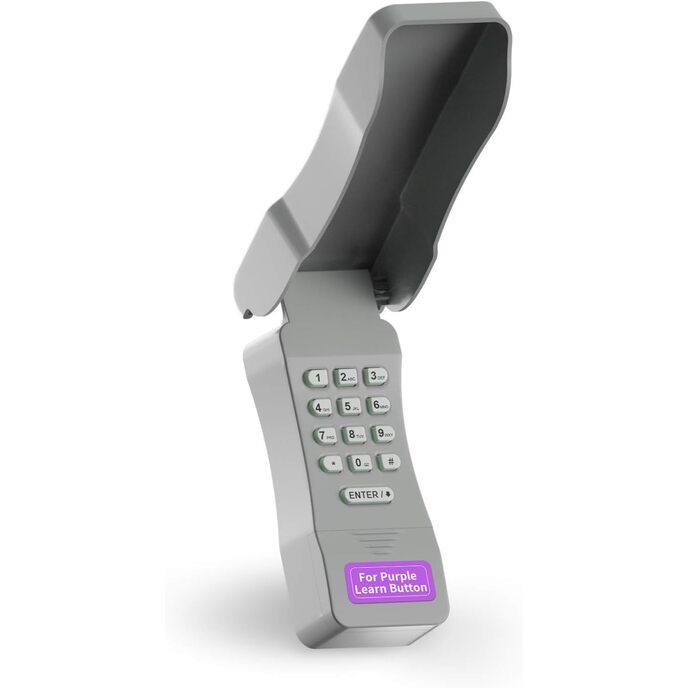
After she pushed it for the first time, my wife said "thank you, thank you!" This was of course followed by "why did you wait so long to replace the old one if this was so easy to do?" "Umm, because I was waiting for the price to drop?" or "It seemed like it was going to be a lot harder to do and I just hadn't found the time on my Honey-do list." Anyway, now that this is installed and all done, my wife thanks me every time she uses it instead of cursing the old button every time it didn't work correctly. Which was pretty often. Anyway, on to the "Wall Console," hereafter referred to as the button. The old one was installed when the house was built in 1996, and had been sticking for several years. Sometimes it would double-click, which would mean you'd have to push twice. Once to close the door that had opened 1" and then stopped, and once again to open. And hope that it didn't double-click again (which it did on more than one occasion). The other neat trick the old button would do was to get stuck in the depressed position, which rendered the whole system inoperable. All pretty annoying. If you wonder why it took so long for me to replace it: My wife parks her car in the garage, while mine parks in the driveway and I use the front door. :) The new button works great. It is huge compared to the old button, and all alone, so you don't have to worry about turning on the opener light when you meant to open the door (or vice versa). And the light inside it is pretty bright. If you didn't notice the big black box all by itself on the wall, you'd certainly notice the red light. (And in case you are wondering from the picture, the green painters tape on the grab bar was to provide some contrast in a field of white for the person using it, who due to glaucoma has a limited field of vision). And, now on to the installation. (I am going to first assume that this is a replacement button and not a first time install. For that, you'd also need to run a two-conductor wire from the button to the garage door opener) Installing this button as a direct replacement couldn't be easier. At least if you have a short garage ceiling. Mine is a little over 10 feet tall, meaning I had to get the ladder out of its hiding place behind piles of junk in order to reach the plug to unplug the garage door opener (step number 1 in replacing the button). Why didn't I just turn off the breaker? Because the genius that built my house wired the garage lights in with the same outlet the opener is plugged in to. And I didn't open the garage door because it was nighttime when I was working. Also during late fall. And the garage faces to the Northwest, so all the cold wind blows right in. That squirrel put to bed, after you have unpacked the box the button came with and have all the tools mentioned in the box (if you are replacing an existing Genie button, you may only need a #2 Philips screwdriver), step 1 of the installation is to unplug your garage door opener (or flip the circuit breaker). Step 2 is to unscrew the old button. Once off the wall, there should be two wires leading into the back of the existing button. Do not disconnect them yet. Take the new button and check to see that the screw holes line up. If they line up, you can skip the next few paragraphs. Tools need for this step(s): Pencil or thin-bodied pen, Philips screwdriver, a tape measure at least 5 feet long, a power drill with various bits <1/4", Small hammer (or very big thumb). Optional equipment would be a stud-detector. If you need to drill new holes for the new button, there are instructions in the box, but you will need a small drill (I don't remember the exact size, but it is less than 1/4"). Once you have found a spot on the wall next to the door where you would like to have the button, mark the locations for the screws by inserting your pencil or pen through the screw holes on the from of the new button and drawing around the outside of the hole. (And per many building codes, they should ideally be 50" up from the floor or step, to keep small children from playing with the garage door and getting hurt). The optional step of looking for a stud, so that you don't need to use the plastic anchors requires the use of a stud-detector, and is outlined a following paragraph. I always start by first drilling a small pilot hole, usually with a 3/32" drill bit to make sure I'm not over a stud. In order to do that, the drill bit has to stick out at least 1" from the drill to get through the drywall. Your drill should go easily through drywall, but less so through wood. The other thing to look for is wood on the end of the drill bit. The 3rd test is to not drill to the full depth of the drill. After you are done drilling and the drill is off, push the drill bit back in the hole. If you are over a stud, you won't be able to push any farther. If there is no stud behind the wall, there will be no resistance felt. If you had drilled a 1/4" hole and gone into a stud too far, you then would have trouble using either type of fastener (screwing directly into the stud, or the plastic inserts). Once you have determined whether you are into a stud or in just drywall, you can then either move on (stud) or pull out the larger drill bit (drywall) and drill the holes to the larger size. After you've done that, now is where the small hammer or big thumb comes in. You need to push/lightly tap the plastic inserts into the holes, flush with the drywall. I like to try putting the screws in now, either into the studs or into the inserts once the inserts are in the wall, just not all the way in, to make sure they will work. If you have difficulty screwing into the stud, you may need a slightly larger pilot hole. Now is the time to find out, not when you have the button halfway mounted on the wall. If the inserts spin when you are just starting the screw, you may need a bigger size or different type of fastener (unfortunately, drywall comes in different thicknesses and grades, and also gets more brittle with age, so what works in a 20 year old house may not work in a 50 year old house. ) For help finding studs next to doorways, most doors will have two studs against either side of the door, which may or may not be touching. You can often find the location of the outermost stud by looking at the location of the light switches next to the door, as they will (usually) be attached to that stud. The next stud may be 16" center to center, or the inside and outside edges of the stud will be about 14.5" and 16" from the door side edge of the switch plate. The reason I say may is that while (most) wall studs are placed on 16" centers, doors usually don't fit in those dimensions, so the gap on either side of the door is likely to be smaller. In the case of my door, the light switch pictured is on the inside of a stud and the button is over the next stud (but off to one side enough to cover the hole where the wire comes through the drywall, so the center to center distance is about 6" instead of 16?). But using a stud detector often starts with a tape measure and knowing where a stud "should" be, so you will know what your detector signal looks like when it finds one. Also, since studs generally are on 16" centers, finding one will usually help in finding others. After you are ready to mount the button to the wall (but before you actually mount it), turn over the button and you will notice two screws on the bottom of the button. These correspond to the two screws on the old button. You simply need to unscrew one wire from the old button and transfer the wire to a terminal (screw) on the new button, and then do the same thing with the second wire. Having done this, turn the new button over, place it against the wall, making sure you aren't pinching the wires (there is a little slot for surface mounted wires to exit) and insert the previously started screws (you did remember to take them out?) and tighten them down. Now all you have to do is plug yo