Kit vernice effetto legno Giani per porte anteriori e interne (noce nera) nero/noce

Brand:Giani Granite

3.3/5

99.65

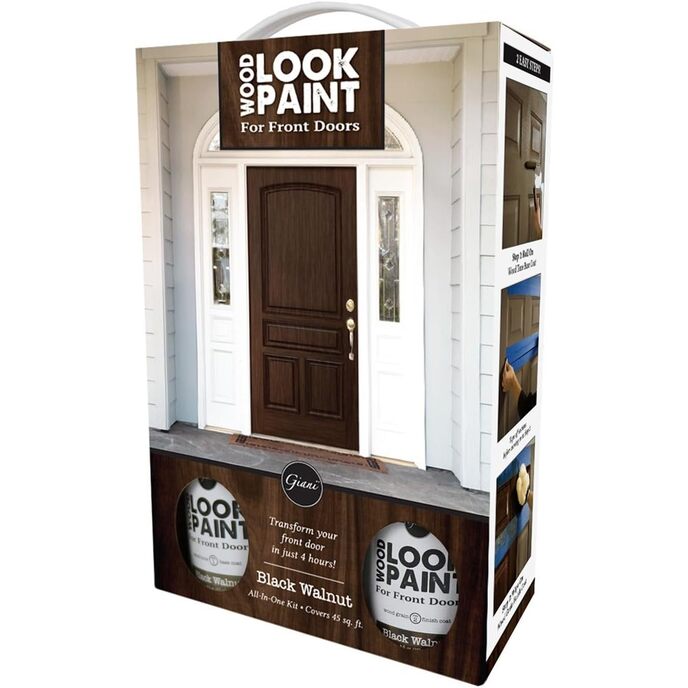
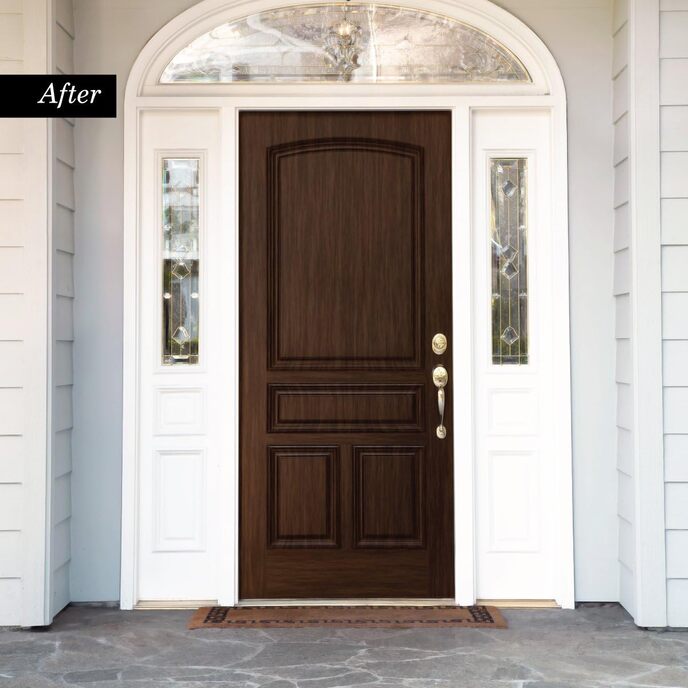
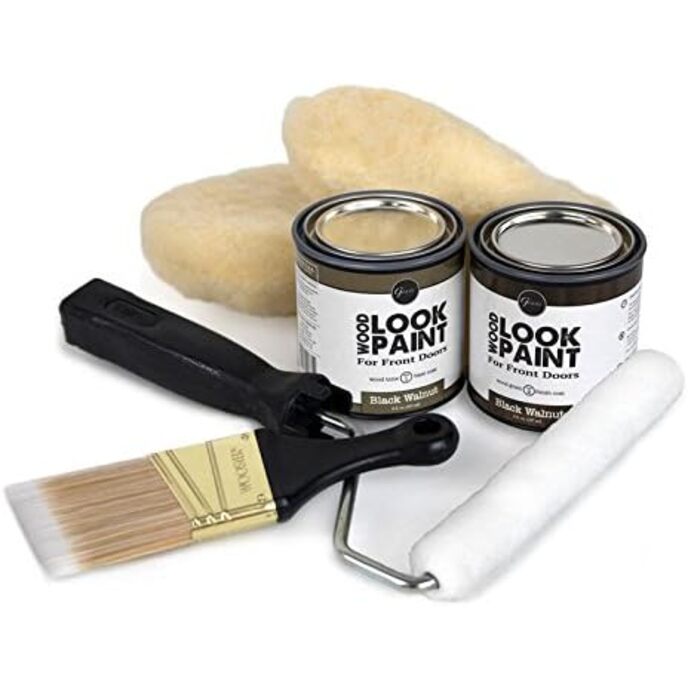
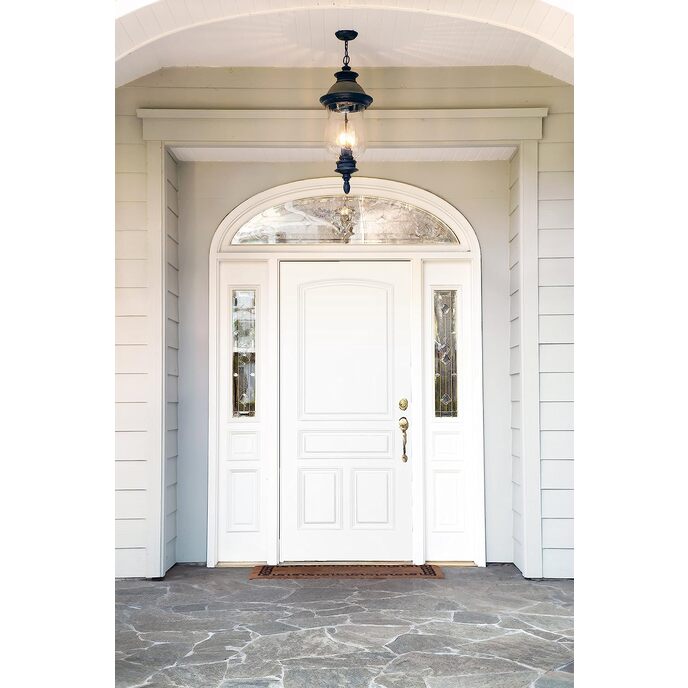
Giani Black Walnut emula il legno di questo albero nordamericano. It’s warm, dark brown tones over swirling black grain complement a wide range of light to medium brick, siding and stucco colors.From simple solid or dull, faded colors to the elegance and aesthetics of natural hardwoods, Giani Wood Look will help you paint your front door to look like wood and upgrade your home’s curb appeal in a single morning or afternoon.Giani Wood Look Paint for Front Doors is a simple, three-step application that will transform smooth, embossed, flat or raised panel doors in just four hours. Ogni kit contiene tutti gli strumenti necessari e copre 40 piedi quadrati di superficie, che include un lato della porta e le luci laterali. Realizzato per l'uso su porte in acciaio verniciato e legno di qualsiasi colore, non è necessario adescare prima di applicare Giani Wood Look. Il nostro esclusivo sistema contiene una base in tonalità legno che coprirà la maggior parte dei colori esistenti in un'unica applicazione, e la nostra finitura Wood Grain Coat appositamente formulata che completa la trasformazione dell'aspetto del legno. Giani Wood Look per porte anteriori rivitalizzerà sicuramente una porta esistente, aggiungerà bellezza a una nuova e trasformerà l'ingresso della tua casa. Abbina questo kit con Giani Black Walnut Wood Look per porte da garage e dai alla tua casa un rinnovamento esterno senza costose sostituzioni.

Si abbina bene con la ferramenta per porte in ottone antico, nichel satinato e ottone lucido. La semplice applicazione in 3 passaggi e la formula ad asciugatura rapida ti consentono di dipingere e chiudere la porta nello stesso giorno. Ideale per acciaio verniciato, alluminio e legno, i materiali standard della maggior parte delle porte d'ingresso e interne. Per l'uso su porte esterne o interne. Aggiungi un fascino istantaneo alla tua casa in sole 4 ore.
Age Range (Description) ‎Adult
Batteries Included? ‎No
Batteries Required? ‎No
Brand Giani Granite
Brand ‎Giani Granite
Color Black/Walnut
Color ‎Black/Walnut
Color Code ‎#271A10
Country of Origin ‎USA
Coverage ‎40
Customer Reviews 4.2 4.2 out of 5 stars 959 ratings 4.2 out of 5 stars
Finish ‎Faux Wood
Finish Type Faux Wood
Finish Type ‎Faux Wood
Full Cure Time ‎4 Hours
Included Components ‎•8 oz. Black Walnut Wood Tone Base Coat
Included Components •8 oz. Black Walnut Wood Tone Base Coat
Is Discontinued By Manufacturer ‎No
Item Form Liquid
Item Form ‎Liquid
Item model number ‎Wood Look
Item Package Quantity ‎1
Item Volume 500 Milliliters
Item Volume ‎500 Milliliters
Item Weight ‎3.16 pounds
Manufacturer ‎Giani
Material ‎Water-Based Acrylic
Model Name ‎Paint Kit
Package Information ‎Can
Part Number ‎FG-WL WAL FDK
Product Dimensions ‎7 x 3 x 11 inches
Size 6 Piece Set
Size ‎6 Piece Set
Surface Recommendation Doors
Surface Recommendation ‎Doors
Unit Count 1.0 Count
Unit Count ‎1.0 Count
Usage Interior
Usage ‎Interior

3.3

6 Review
5 Star
67
4 Star
12
3 Star
8
2 Star
3
1 Star
9

Scrivi la tua recensione

La tua mail non sarà pubblicata. Tutti i campi obbligatori sono segnati con*

Scritto da: Angela
Great kit!
This is a great kit. Especially if you don’t already have paint brushes etc. The mitt is huge and has a protective lining with some kind of crinkly plastic inside of it. I cut the lining out and just used one of the plastic gloves in the kit to protect my hand from the stain. It was much easier to control the mitt that way. Follow the directions carefully. I got lazy towards the end and put too much stain on the horizontal areas so they’re a little darker. My family said they can’t tell the difference though. Overall, I’m really happy with the finished product.
Scritto da: Lisa
This is a FAUX finish!
Color: I chose the Honey Oak color for my back door since the entryway flooring was honey oak vinyl. I felt the base color was very light and slightly pinkish. The stain color is OK, but I think the contrast between base and stain (I refer to it as stain, but it is really a type of glaze that creates the wood grain look) is too great and a less than perfect application is very noticeable. I wasn't totally pleased with the results, but intrigued enough to try a different color. I chose English Oak this time. The base wasn't that much darker, but it had a warmer tone and the stain was much darker. Door: Essentially, the door I was working with was in pretty sad shape and not worth too much trouble. Layers of paint collected in panels that couldn't be easily sanded had to remain and I couldn't remove the door or knobs in fear that it could not be rehung properly or locks function. Removing the door is not necessary, but definitely remove hardware if possible. Application: I learned alot from my first attempt! 1. Base coat is easy, just straight painting. Directions say to pour half into a tray, but a little goes a long way and I just used it straight out of the can. Less waste/clean-up. 2. Taping for the staining is key. If you have a panel door, you will stain in two directions. Instructions say to tape out horizontal panels, stain/dry and then vertical panels, stain/dry. I felt the inset panels looked messy when the whole panel was done horizontally. I took an extra step to tape out the vertical and horizontal sections of the panel and created the look of a mitred corner(I did this in the window corners also). Even though it's a crappy door, it made a difference. 3. The graining mitt is huge! As a woman I don't have a small hand, but I was swimming in it and it was hard to control. I tucked the thumb to prevent it from creating unwanted strokes in the finish and I only applied stain directly to the end of the mitt (not the whole palm as instructed). The instructions say to dampen the mitt in water and wring out the excess. It was very difficult to wring it enough and the stain got watery and dripped excessively. Learning from this I only lightly damped the one side of the mitt I used. 4. Use quick light strokes. Instructions say 2-3 coats depending on desired effect. I used four. (I might have done 5, but I was low on stain because I had also refinished the beadboard under the back door overhang. Looks great and only used 3 coats) The first couple coats might look a little messy, but as it gets darker with additional coats there is less contrast and it starts to look more natural. It dries fast, but with the extra coat I wanted to be sure the taped corners were dry so I did my vertical and horizontal sections on separate days. All said and done I am fairly pleased with the results, but I also accept it for what it is, FAUX!! I don't feel it would be worthy of my front door, but I am considering the garage door version. The kit is loaded with everything you need. It's too recent to really judge the durability, but seems pretty good so far.
Scritto da: Cnstnce
The more the better
Keep adding coats until you run out and it looks better with each coat. Otherwise easy project to do on a nice temperate day.
Scritto da: Kay
Liked the finish product , the process needs refining .UPDATED 11/28/2021
I’m a thorough reviewer so I’ll try to summarize as best as I can . Overall, I like my final product, I bought two kits of the black walnut for both sides of my front door. My husband was weary and couldn’t envision it working , but by the end he was a bigger fan than me. That’s not to say there weren’t issues. Issue 1 - tape; I was skeptical that the process could be so quick given the use of tape to section off vertical and horizontal sections. I just envisioned the painters tape peeling off freshly painted base coat sections. When I did the first side I was so happy that this wasn’t an issue. However, the same cannot be said for side two. I did these on the same day- one side after the other. On side two I had multiple issues of tape pulling up the base coat . I even waited a full day to go paint the horizontal sections and it peeled up the vertical wood paint on one small section. So, I think it’s kind of a crap shoot. - it’s worth noting that before painting or moving on I did feel and look to see if paint was dry- no rushing on my part. Issue 2- the mitt; I didn’t think there would be much to complain about with the mitt , but it ended up being the worst part of the project. So , as I was doing the first side I noticed that the mitt deposited a lot of little fuzz on the door. When I did the second side I wrapped the mitt with painters tape and took the tape off to get any loose fuzz, it lessened the problem but it still was still there. The worst part of the mitt was the size of it and the plastic coating that protects the inner part (where your hand goes) and the outside (where the paint goes). There is a plastic in between to keep your hands clean and this plastic makes the mitt almost move uncomfortably and it becomes harder to control your motions because the outside goes one way and the plastic goes another. It sounds weird until you experience it. The size is also just so large that it just makes it hard to control all aspects of the mitt. I know we want free flowing natural motion but the mitt doesn’t need to be that large- most 32-36 inch doors have small vertical and horizontal sections and this just makes it clumsy. Nevertheless, I would repurchase it as it does make the door look very wood like and have the effect I wanted. I will also say that these kits and another brick kit I bought from this brand are so complete and nice. They have drop clothes , full rolls of painter tape, which is a great deal. I would have liked a tray for this kit , but you can’t get everything. I would say give it a go, just be aware you might have a few issues. UPDATED: since about September with the air conditioning off I’ve been noticing a weird melted plastic / varnish smell in my home. The smell would only hit me in the middle of the day when the sunlight beat down on the front of my house. I smelled the door and sure enough it emits this weird odor now. I think the sunlight and heat makes the smell come around , but my air conditioning keeping the door cooled but also messing with the air hid the smell.
Scritto da: V
Anyone can Paint!
This product is fantastic. I can’t believe how it turned out. During the process I had doubts. I would only recommend taking more time around in lays and corner with the paint brush not the mitt. Overall, the process took quite a bit of time. I had a lot of interruptions. But the end results saves $1000’s and is better than throwing away something that still works. Just isn’t the right color. I highly recommend this product, and hope you keep the price where it is, because it makes it attractive for someone who can’t afford a door, and provides all the above mentioned benefits. Thank you!!
Scritto da: Amazon Customer
What a transformation
Front entrance door! Was builder grade metal wrapped door !

Prodotti correlati

Scopri il nostro network internazionale

Spediamo in 28 paesi, oltre 200.000 prodotti. Resta aggiornato, iscriviti alla newsletter.

Shopping Cart