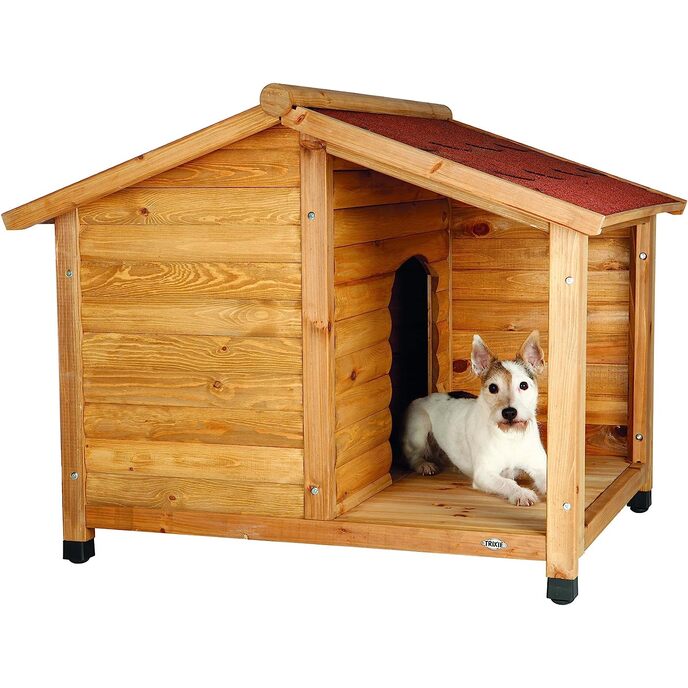
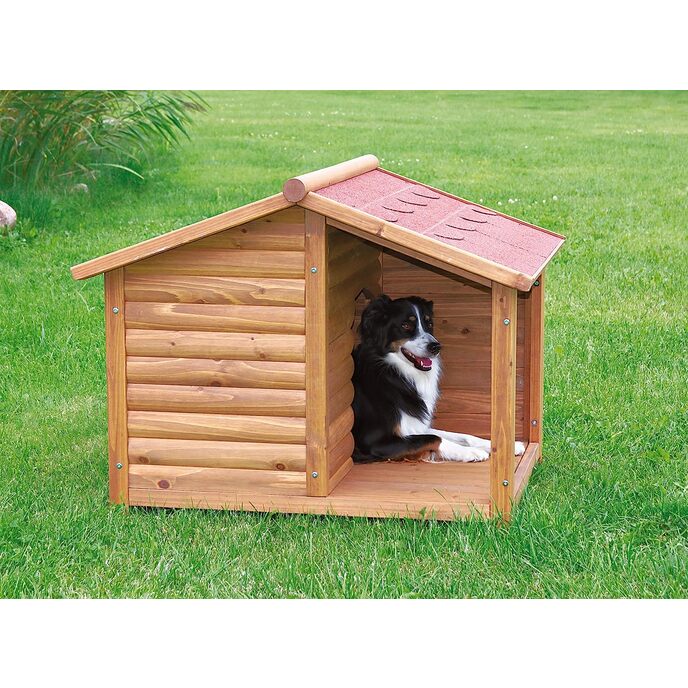
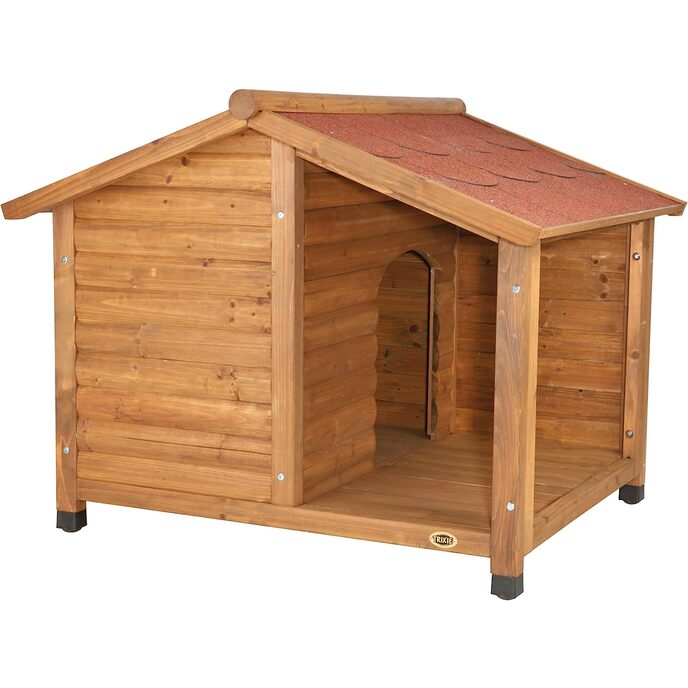
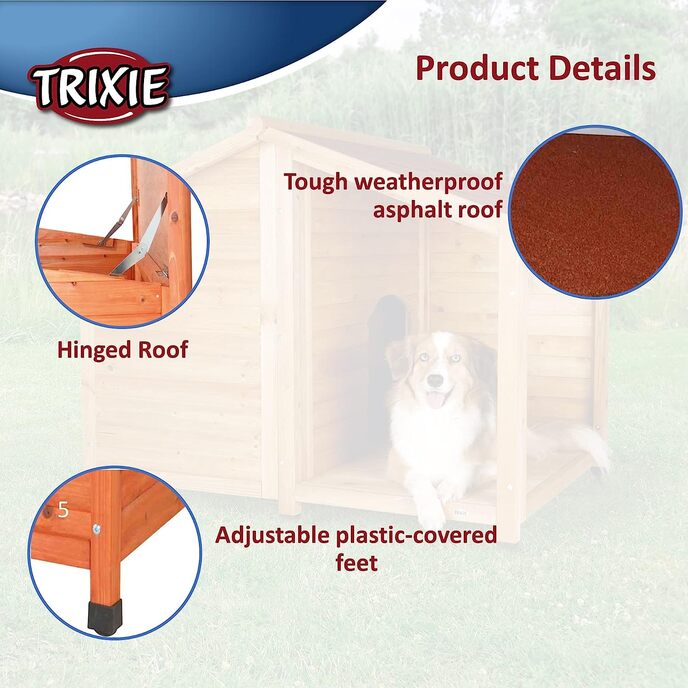
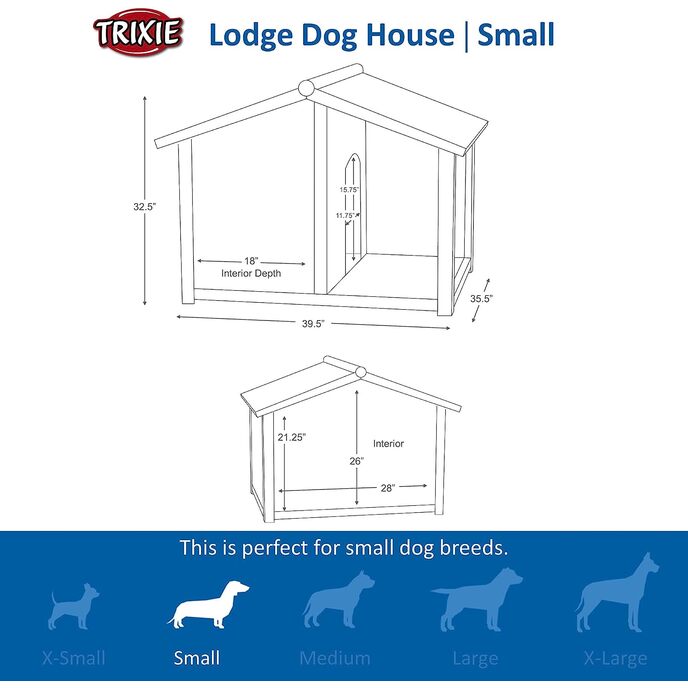
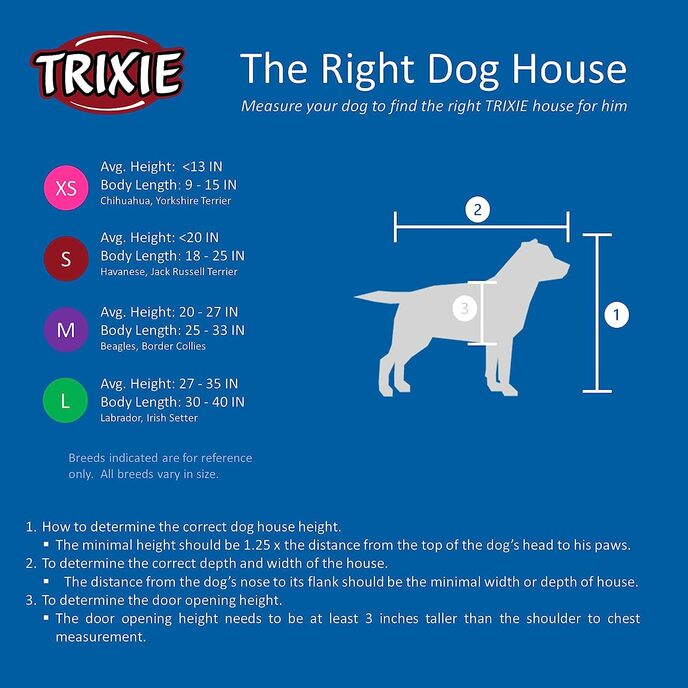
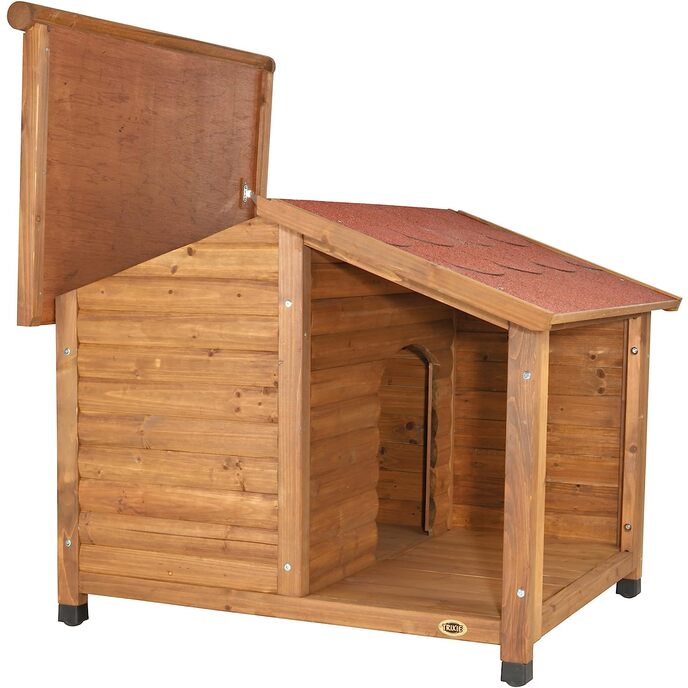
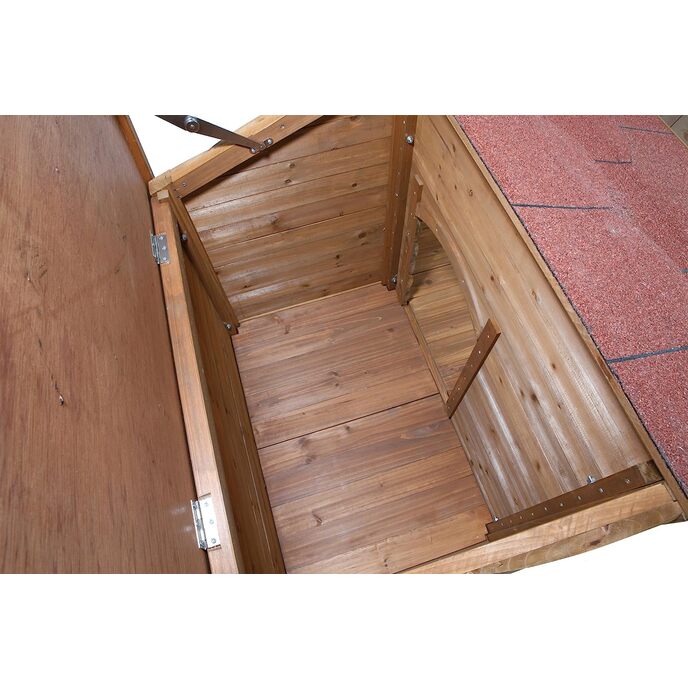
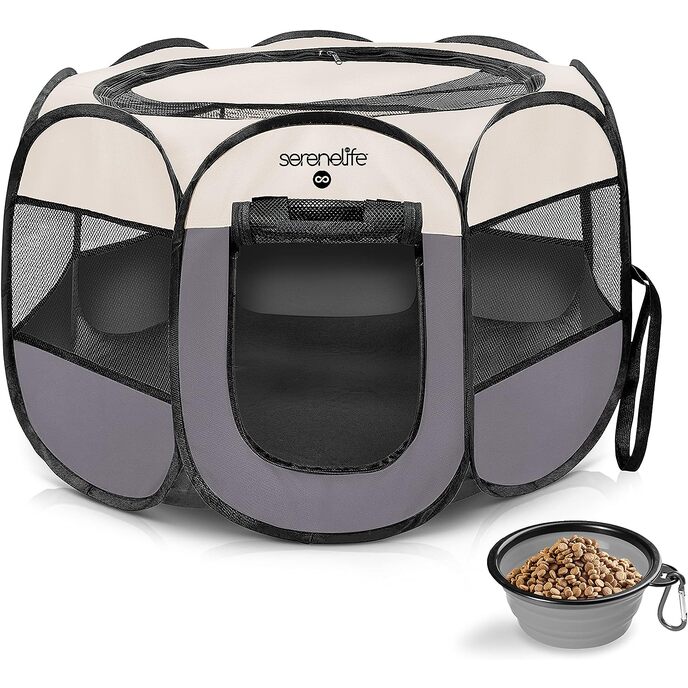
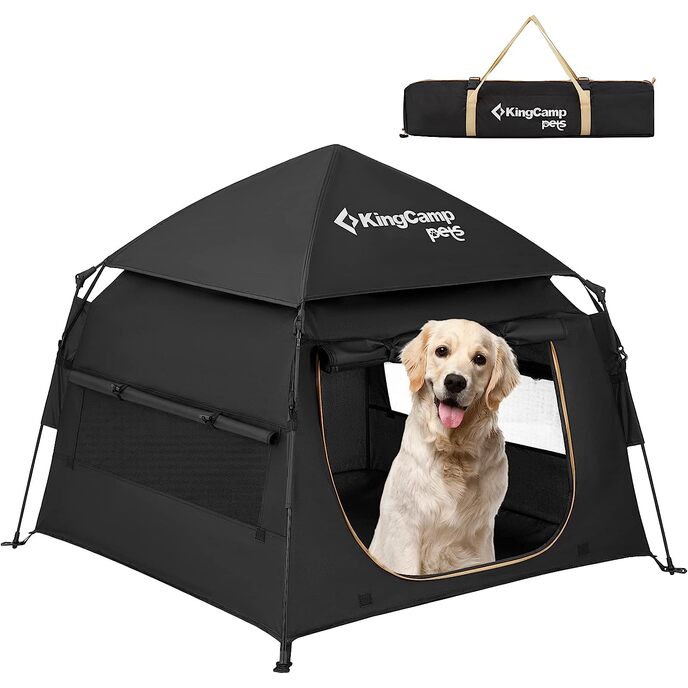
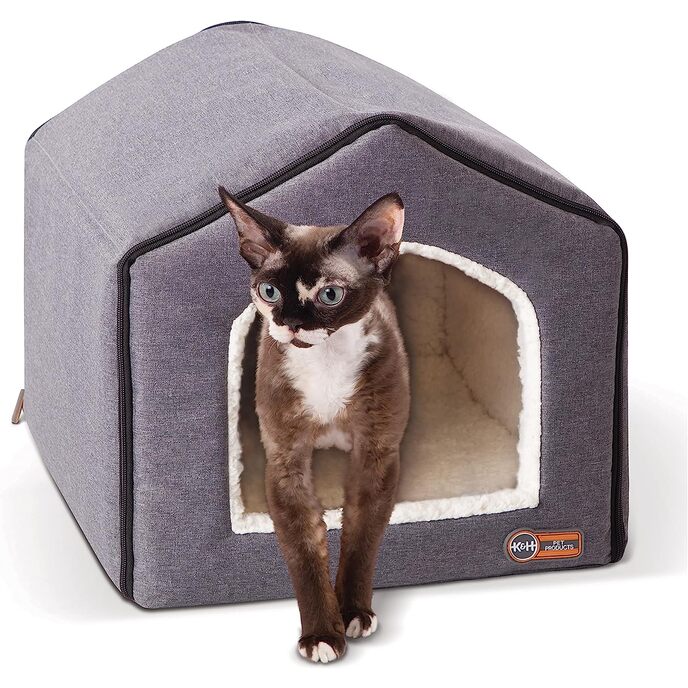
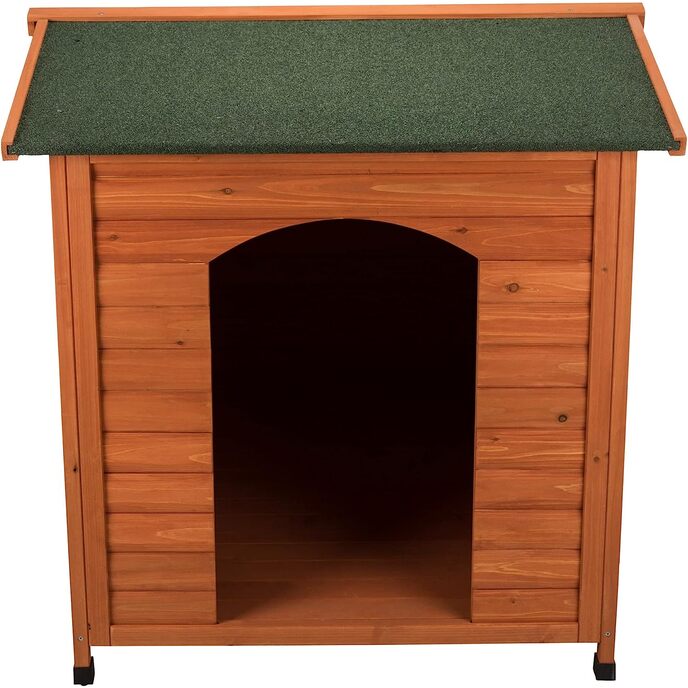
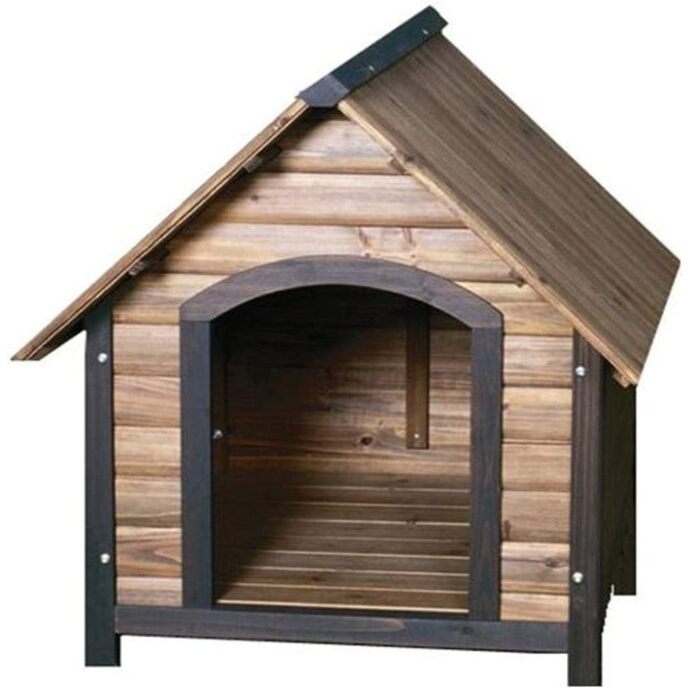
We just received the second box on this. They shipped together, both of them were supposedly out for delivery by UPS 4 days ago. The first box was delivered, but the second was not. The tracking showed it had arrived in town the same time as the first box, and then nothing else. Finally it showed up as having arrived in town again last night and was finally delivered today. The packaging is a bit marginal for such heavy items and the second box was a bit torn up. There was a tiny bit of damage to the contents, but a couple of extra screws and a bit of epoxy took care of it. One nice thing..all the screws and bolts are attached to cards identifying the part numbers. And there is one extra of each type of screw. Second, the design has been updated since the photos here. There are now 2 more legs, right in the middle, under the peak of the roof. Its pretty solid now. I was able to get inside for part of the assembly. You need to be a bit careful where you step (I am 200 lbs), but if you keep your weight near the edges of the floor panels while standing, its fine. You just don't want to concentrate all your weight on one of the floor boards. Sitting down is just fine. Overall, assembly is pretty easy. It helps to have 2 people for getting the nuts on some of the bolts, but I managed most of it on my own. The instructions are OK, but not very detailed. For tools, you need a #2 Phillips screwdriver, preferably powered, and with a somewhat long bit or extension. An inch is OK, 2" is better. You also need a 10mm socket wrench, and it should be pretty small in outside diameter. There are a few things to watch out for. First the parts list shows two "battens" which are part of the central wall. They are NOT the same. Almost, but the bolt holes are different. Check the bolt hole match with the front and rear walls to see which way is up, and then look VERY carefully at the "not very big" assembly drawing to see which side goes to the "porch". Yes, I got it wrong and had to redo it. Second, there are 4 floor panels listed, they are ALL different. They only fit one way, but its pretty obvious when you look at the dimensions and corner cut outs. When bolting all the walls together, I found it useful to loosely tighten all the nuts then get the floor panels in and everything squared up, then do final tightening. The one place its really helpful to have 2 people is when installing the hinged roof. The roof panel is pre-hinged to a wooden frame member that becomes the top of the side wall. But its short and hard to hold in alignment while getting the screws started. If you have help, get someone to hold the roof vertically while you put in the 3 screws that go in from the inside. Then close the roof and put in the two screws from the outside. (this is where you need that longer Phillips screwdriver bit, since the screws are up under the roof) The trickiest part of all is the folding braces that latch the roof panel fully open. They give you some predrilled holes in the roof panel, but nothing on the front and rear walls. The problem is that the position of the brackets on the walls is very critical. If you get it wrong the roof will not close, and you might damage the hinges or the wood frame member they are attached to when you close the roof the first time. The easy way to take care of this is to just get inside, close the roof and put the screws in. The brackets need to be at the very bottom of the upper rails of the walls, and at the right distance from the hinge. It is pretty obvious once you are inside and can see how things want to fit. But its impossible to tell from the outside. You could do some very careful measurements about the distance of the brace pivots from the hinge line (should be the same within about .1", with the bottom pivot being the same or .1" longer distance from the hinge line as the upper pivot point.) Anyway, with the large size dog house, it was reasonable to just climb inside and do the brackets. The final thing is that the box says the wood is finished, but it really seems bare to me. It does have a nice fresh smell, and the quality of the wood is pretty nice. The legs have screw in adjustments for the height so its easy to get it to sit solidly on an slightly uneven surface. The plastic legs also slide pretty easily on our state patio, which is nice because the doghouse is nearly 90 lbs. Anyway, we really like the dog house. I would give it 5 stars on design and value and quality for the price. The issue is the assembly. Labeling the parts that can be confused would help, as would some templates or predrilled holes for the roof braces. So, overall, I will give it a 4 out of 5. And, they obviously fixed some of the problems that previous reviewers commented about. So, if you like the looks of this one, and you are reasonably competent about assembling things, then yes, this is a good doghouse to get. One final thing.. Our dog is named Trixi, and its nice that they have a little plate with her name on the front wall.. even if they did spell her name wrong (Trixie). ;-)