Titan 85510 Tagliatubi a cricchetto, tagliatubi automatico da 3/16 pollici Tagliatubi automatico da 3/16 pollici Strumento di svasatura dei freni

Brand:Titan

3.7/5

70.27

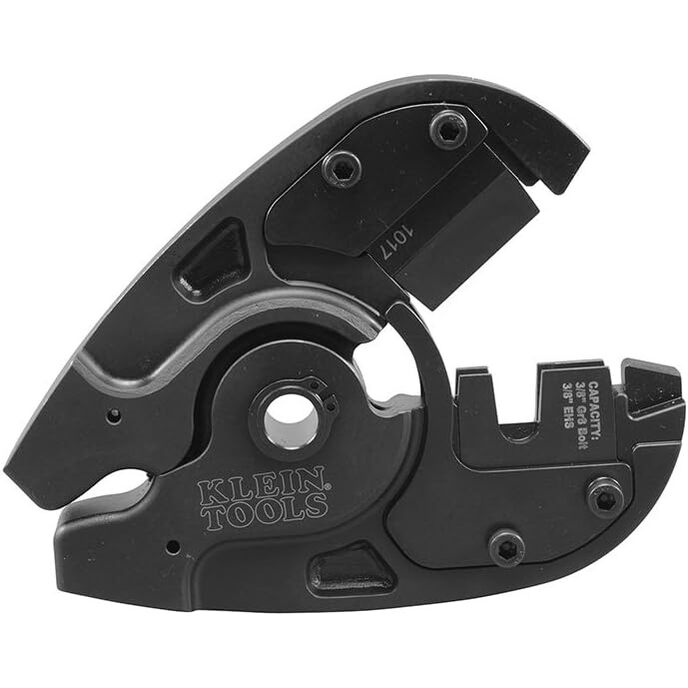
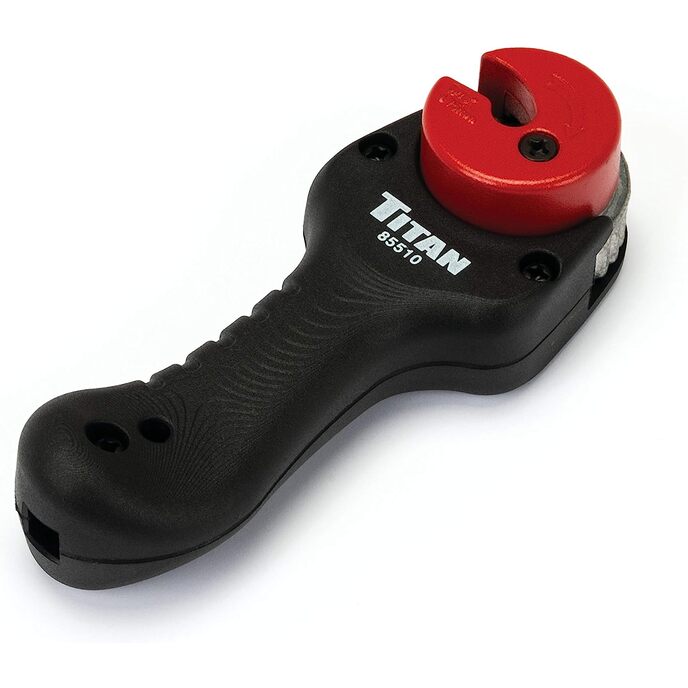
Titan - Taglia linea automatica dei freni (85510)

Realizzato pensando all'utente utilizzando materiali di alta qualità e maestria artigianale di livello mondiale. Provato e testato per durata e funzionalità in condizioni reali. Adatto per soddisfare le esigenze in negozio, a casa o sul campo. Progettato pensando all'utente. Realizzato per resistere anche ai lavori più difficili.
Batteries Included? ‎No
Batteries Required? ‎No
Color ‎Factory
Country of Origin ‎Taiwan
Customer Reviews 4.6 4.6 out of 5 stars 2,630 ratings 4.6 out of 5 stars
Included Components ‎Manufactuered Brand Product
Item model number ‎85510
Item Package Quantity ‎1
Item Weight ‎4.2 ounces
Manufacturer ‎Titan
Part Number ‎85510
Power Source ‎Hand Powered
Product Dimensions ‎1.4 x 2.8 x 6.2 inches
Size ‎3/16-Inch Automatic Brake Line Cutter
Style ‎Brake Flaring Tool
Warranty Description ‎One Year Limited Warranty

3.7

13 Review
5 Star
82
4 Star
10
3 Star
4
2 Star
1
1 Star
4

Scrivi la tua recensione

La tua mail non sarà pubblicata. Tutti i campi obbligatori sono segnati con*

Scritto da: Prof Daddy
Some thoughts on Nickel Copper brake line
Everything about this tool is simple and it seems to be exceptionally well made. I bought it to use on nickel copper brake line. As some have mentioned it doesn't seem to work well with nickel copper. I find the same thing to be true. As others mentioned I tried setting the tubing back from the alignment bolt. I tried 1/16" as one review suggested using a1/16th drill bit. Came out terrible and I'd say unusable. Tried half that set back. With this flare I treated it like I would a tap and die. I turned less than an 1/8th of a turn, backed off, and repeated until tight. I also went great lengths to be sure the tubing end was square and well reamed of burr. This still didn't look too great. Then I thought this is nickel copper. It's pretty soft. I removed the bad brake line from the diverter and ran the tubing flare in with original flat nut. Tightened it, then removed it. It looked pretty good. I won't be able to tell of it's functional until I install the brake line and test it under pressure, but I think it's going to work just fine. I will update with the results of that testing. Steel isn't going to form fit like the nickel copper does so the flare probably has to be more precise but a softer metal will firm to a harder metal. I knew about the issues making double flares on the nickel copper but I had to weigh that against the difficulty of running steel brake line. I've run steel before and it's a lot of work making all bends and then running it. Sometimes you can't do it without a lift to get more space under the vehicle. The nickel copper is really easy to bend. With steel I use the old factory brake line as a template to get the bends close to correct. In this case the original brake line was run between the frame and the gas tank. Removing it and running in the same location would require dropping the gas tank or removing the truck bed. The nickel copper will be easy to run on a new path, putting gas line around the tubing for chafe guards at new fastening points. Update: installed nickel copper brake line. Flares were not perfect but having checked with a friend who owns a Audi car repair who related the fact that you never get a flare like a factory flare even with the most expensive flare tool and confirmed my theory that nickel copper would form to the seat, I used the less than perfect flares and... no leaks. The nickel copper line was much, much easier to install. I'm very happy with this tool. BTW, when using the tool chucked up in a vise or was no only easier to use but also made better flares. Next time I think I will get a tubing straightening tool. I find that isn't straight where you are trying to make the flare it exacerbates all the issues making a nice flare. It seems it should be centered on the tool which won't happen if it's bent at all. After installing the brake line I used the tool as best I could to straighten the brake line at the tip because it was obviously not straight. I also used a metal file to even up the end and a reamer to smooth the opening. My advice is don't skimp on the grease either.
Scritto da: mmaerz
Accurate flaring but tricky to use
I would have liked to give five stars, but the brake fluid dripping from my elbows and running all over the garage floor precludes that rating. First, you must understand that I tried using a rental "flaring kit" from NAPA. Essentially, it was a standard plumbing flaring tool with specialty dies for flaring brake tubing. The 3/16" die had a broken guide pin which allowed the die to wander and off-center the inverted flare. Three of the flares I made failed. My own plumbing flaring tool did no better (no dies). The Titan tool is very accurate and precise. I tested the tool on several scrap brake lines and made perfect inverted flares. When using the tool on practice brake lines it is easy to manipulate the tool and tighten the forming dies; no fluid leaking and no awkward work space to contort into. Flaring brake lines ON the car can be a different story. Limited space, tight access, and leaking fluid can make for a frustrating experience. Brake fluid is extremely slick and the Titan covered with brake fluid is a pain in the ass to hold on to. For a righty like me the tool works best when tube enters from left and tightens with the right hand, especially when the wrench and handle are close enough to squeeze to tighten, which prevents tool from excessive movement (which can bend tube while you try and torque the die). Simple, srtraight-line flares can be easy, as long as you can easily manipulate the tool. In my case the brake line corroded and rusted at the compression fitting and I had to remove the damaged section. Unfortunately the brake line was preformed and ran all the way to the engine compartment. Not wanting to replace the entire line I opted to create a preformed stub to connect the brake line to the brake hose connection using barrel connectors to splice the lines. I learned several important lessons 1) When preforming small stubs you must account for the length of tube inserted into the tool AND the length of the compression nut. 2) Small stubs with a curve must accomodate for the compresion nut. 3) While using the Titan, the die block MUST NOT WIGGLE OR MOVE. Movement will bend the tube and kink it. Once kinked it is near impossible to straighten AND the compression nut will NOT pass over the kink. 4) DRAIN THE BRAKE FLUID. Even if it means priming the master cylinder later, it beats saturating your hands with brake fluid and having it run down your arms and onto the floor, or worse dripping in your face or saturating your clothes. If fluid gets on the Titan tool, good luck trying to hold it while tightening the die, especially if you are working with limited access or playing lefty-righty trying to get good leverage. 5) If you can replace the entire brake line without major disassembly or rust problems, do so. 6) Use the copper-nickle tubing, it is much more forgiving and can be formed by hand. I screwed up several steel lines with my bending tool and then used them for practice. This is where I really came to appreciate item (1) above. There are some great videos about bending and preforming brake lines. I found one that shows how to calculate bends, bending offsets and direction changes (video for techs in training). Well worth watching.
Scritto da: Northbay Diesel
Great tool
Dont flare lines often but this tool was very handy and a great deisgn. Small enough to use in a difficult location on a vehicle. Got the job done first try.
Scritto da: Becca Yuan
Use more grease!
Tried various things and still got warped twisted flares. Then I added a lot more grease including the surface that formed the back of the flare and plenty on the flaring screw. Now I get great bubble flares!
Scritto da: Anthony Venditti
Awesome!!!
This flaring tool is so much easier to use than the old school bar style flaring tools. You get perfect and consistent flares every time! Only thing I would like to see is a full kit with the different dies for other sizes. By far the easiest flaring tool I've ever used.
Scritto da: Marcus Shelby
Great tool!
The best thing since sliced bread! This tool is fantastic. Took me about an hour to plumb my whole brake system from scratch. Wish I had this tool on other cars I've built in the past.
Scritto da: Geo
compact and solid
makes easy use for repairing on vehicle once you get the hang of operating it....
Scritto da: G.Zimbraunt
Good to have in a pinch
Proved to be very worthwhile in sparing me from having to replace very long brake lines. Worked in the car with some effort.
Scritto da: Tim
Great value definitely recommend
Extremely effective at flaring steel pipework op 1 and op 2. Very impressed at the value for money
Scritto da: gonczo
It really works....
I have a classic car that I'm re-restoring after restoring it 25 years ago and I decided to replace the brake and fuel lines. I have had the standard flaring tool that I think most back yard mechanics have and I've never had 100% good luck with trying to create double flares with that tool over and over. Because of the number of flares I would have to do I needed something that double flared brake lines perfectly over and over. I went on YouTube and looked at the videos others had posted and this tool came up over and over. I watched the videos and said to myself if it's as good as these video's make it out to be maybe that's worth buying. I ordered the tool and when it was delivered I went right out to the garage after supper and tried to do a couple of double flares with it. Well... what you see in the videos is exactly what you get. The tool worked perfectly, not just once, but three times in a row I double flared some scrap pieces of brake tube and each one was not just OK.... they were perfect! I always say, ask someone who has spent the money on something and they will tell you honestly. I spent the money and I'll stand behind what I just wrote here, THIS TOOL WORKS!!!! ...... and the first flare I did I thought would be a test and then I would get better at using the tool.... no.... the first one I ever did was as good as the third one. Buy this tool with confidence that it will do everything you want it to do.... oh... because it's so small and hand held, you don't have to clamp it in a vise for it to work, you can do the flare right there on the car, no problem. The only draw back with this tool, if you can call it a draw back is it only does 3/16" tubing, would be nice if it could do other sizes, but hey.... 3/16" tube is what you flare 90% of the time. I hope this helps someone because buying tools is such a crap shoot sometimes so it's nice when you buy something that actually works.
Scritto da: jake
Found a fix!
I wanted to love it. It looks awesome. Didn't work good for me. Found a fix! I am using nicopp 3/16 brake line. On the back of the flare (where the brake line nut touches the flare, it would always bubble and wrinkle on me. I was flipping mad. Some other reviews said to add a shim so that new brake line doesn't go into the block as far. That worked for me. The little depth stop nut, let's in to much brake line. The visual hole going through the block where you can see the depth stop bolt touch the brake line, incert a 1/16" spacer. I used a 1/16" drill bit. IT ABSOLUTELY CAME OUT PERFECT THE FIRST SHOT! add a little bit of grease to the threads of the tool so nothing can strip out. I was about to junk this thing.... It seems to work nice now. Thanks everyone for letting us know. If it still gives you problems, adjust the depth yourself. Also, after you first op1, loosen the 2 bolts and rotate the tool 90 degrees so the clamp seam is more even. Looks nicer.
Scritto da: Rob J
Saved the day!
Bought this tool a few months ago, just in case I needed to replace a brake line in a tight spot on my 05 Honda civic. Well last week it happened! I had a rear brake line leak from the rubber line to the rear brake drum. After taking the old one off in pieces (tip: use a pair of needle nose Vise Grip pliers to pinch the rubber brake hose from draining your brake fluid reservoir when replacing the steel line) I found out the Honda uses bubble flares! I had a 12 inch piece of steel PolyV brake lines with the two nuts on the end that you can buy pre flared with the double flare. I just cut the ends off and made a bubble flare with the Titan tool, no problem and bent it into shape with this tool, "TruePower 02-0202 Brake Line Forming Tool with Pliers and Bender" makes flawless small diameter bends without kinking or marking up the brake line. I also used the two nuts that came with the line. ZERO LEAKS! NOW....I find out later, after doing some research that the bubble flare that this tool makes is not a true bubble flare and the two nuts I used off the double flare are NOT made for bubble flares. Google pics and you'll see the difference. The bubble flare fittings have a section that is not threaded where the bubble flare sits up against. Might have to redo the line but for now it works great and no leaks!
Scritto da: GP
Reasonably good, better than the others I have tried
The only issue that I had was the stop that is screwed into the die to set the depth of the brake line did not work for me. I found the stop brought the brake line out too far resulting in a very deformed flange when finished. I tried many times with bad results See the pic on the left. After experimenting for awhile I found by not using the supplied screw in stop and replacing it with a 5/32" drill inserted into the hole at top and letting the brake line rest on that while tightening the 2 screws allowed just the correct amount of depth resulting in a near perfect double flange. I tried various drill diamaters until I found it to work. You may find the tool to work right out of the package for you, but this is a fix for the brake tool that worked for me if you experience deformed brake lines like I did right out of the package. See pics showing how the set screw stops the brake line and my version using the drill bit to set the stop for the brake line. The pic of the two finished fittings shows the deformed line then the near perfect fitting on right compared to the pics on the packaging.

Prodotti correlati

hot
Punte di ricambio Greenlee 9953-13
3.6/5

€ 26.13

Punte di ricambio Greenlee 9953-13
3.6/5

€ 26.13

Scopri il nostro network internazionale

Spediamo in 28 paesi, oltre 200.000 prodotti. Resta aggiornato, iscriviti alla newsletter.

Shopping Cart