Norpro Frozen Ice Pop Maker, uno, coperchio blu un coperchio blu

Brand:Norpro

3.4/5

47.02

DESCRIZIONE DEL PRODOTTO Delizie surgelate su misura per tutti! Crea pop congelati utilizzando qualsiasi combinazione di succhi, puree, yogurt, salsa di mele, gelatina, frutta, gelato, panna montata, latte e budino. Le combinazioni sono infinite! Prepara ghiaccioli salutari in qualsiasi momento senza sostanze chimiche, additivi, coloranti o zuccheri aggiunti. Lo stampo riutilizzabile nella classica forma di ghiacciolo è privo di BPA. Il set resistente include un telaio in alluminio con stampi in plastica, coperchio con occhielli per tenere i bastoncini in posizione verticale e dritti mentre si congelano i dolcetti. Include anche 24 bastoncini di legno usa e getta di dimensioni standard. Non dovrai chiedere indietro le tue maniglie. Norpro è stata fondata nel 1973 con l'obiettivo di progettare, produrre e fornire utensili da cucina di altissimo livello. L'offerta di Norpro di prodotti innovativi e di alta qualità per cucinare, preparare e servire il cibo è prodotta con materiali e artigianalità superiori. AMAZON.COM Crea prelibatezze utilizzando succhi, puree, yogurt, purea di mele, gelatina, frutta, gelato e budino. Produce 10 prelibatezze da 3 once / 90 ml. Plastica resistente senza BPA con occhielli nel coperchio per tenere i bastoncini in posizione verticale e dritti. Include 24 bastoncini di legno. Si consiglia il lavaggio a mano.

Lavaggio delle mani. Include anche 24 bastoncini di legno usa e getta di dimensioni standard. Non dovrai chiedere indietro le tue maniglie. Il set resistente include un telaio in alluminio con stampi in plastica, coperchio con occhielli per tenere i bastoncini in posizione verticale e dritti mentre si congelano i dolcetti. Lo stampo riutilizzabile nella classica forma di ghiacciolo è privo di BPA. Delizie surgelate su misura per tutti! Crea pop congelati utilizzando qualsiasi combinazione di succhi, puree, yogurt, salsa di mele, gelatina, frutta, gelato, panna montata, latte e budino. Le combinazioni sono infinite! Prepara ghiaccioli salutari in qualsiasi momento senza sostanze chimiche, additivi, coloranti o zuccheri aggiunti. Produce dieci prelibatezze da 3 once / 90 ml di circa 3,5 x 2 x 1 di dimensione.
Brand Norpro
Color Blue Lid
Country of Origin China
Customer Reviews 4.4 4.4 out of 5 stars 3,029 ratings 4.4 out of 5 stars
Department Kitchen
Is Discontinued By Manufacturer No
Item Dimensions LxWxH 9 x 5.5 x 4 inches
Item model number 423
Item Weight 0.95 Pounds
Item Weight 15.2 ounces
Manufacturer Norpro
Material Plastic
Material Type Free Bpa Free
Number of Pieces 1
Product Dimensions 9 x 5.5 x 4 inches

3.4

3 Review
5 Star
67
4 Star
16
3 Star
10
2 Star
3
1 Star
4

Scrivi la tua recensione

La tua mail non sarà pubblicata. Tutti i campi obbligatori sono segnati con*

Scritto da: KBarb
Review / Tips / Use an emulsifier
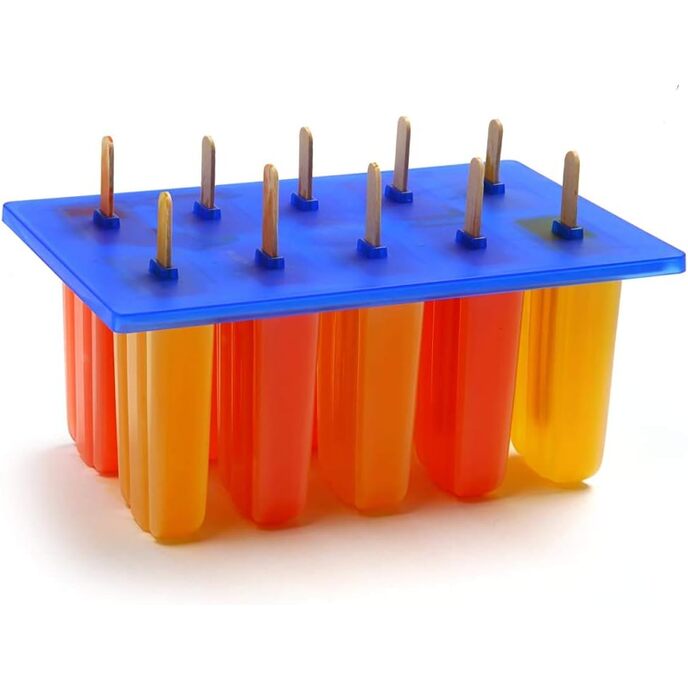
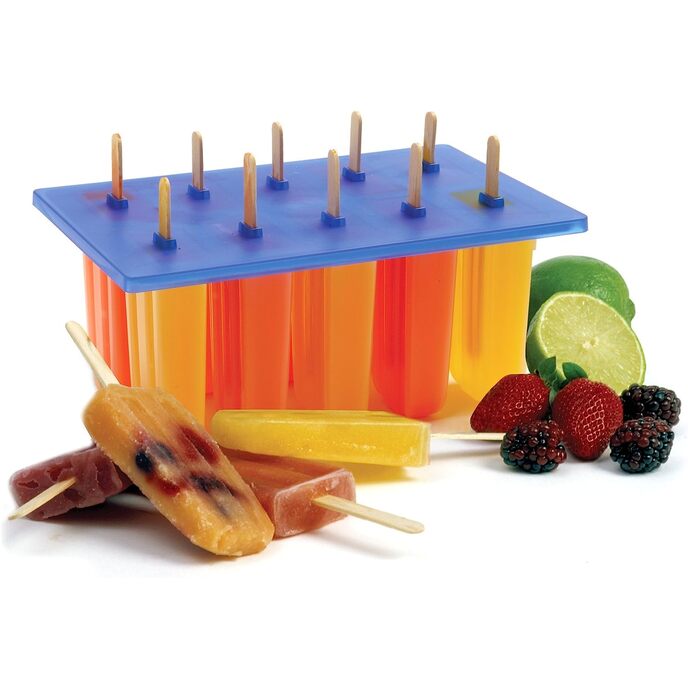
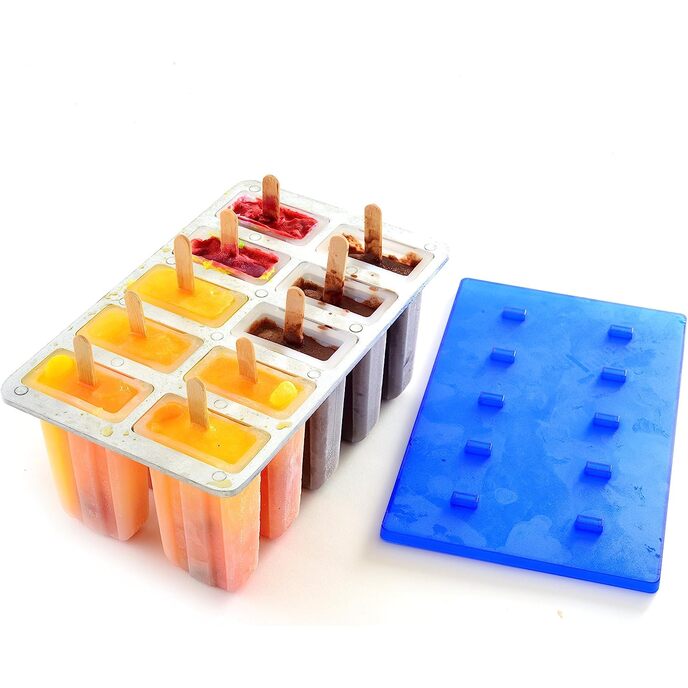
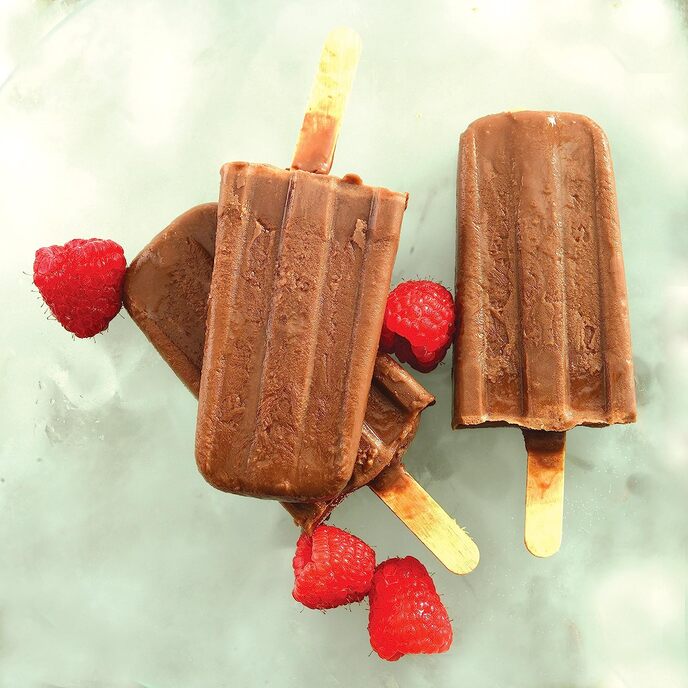
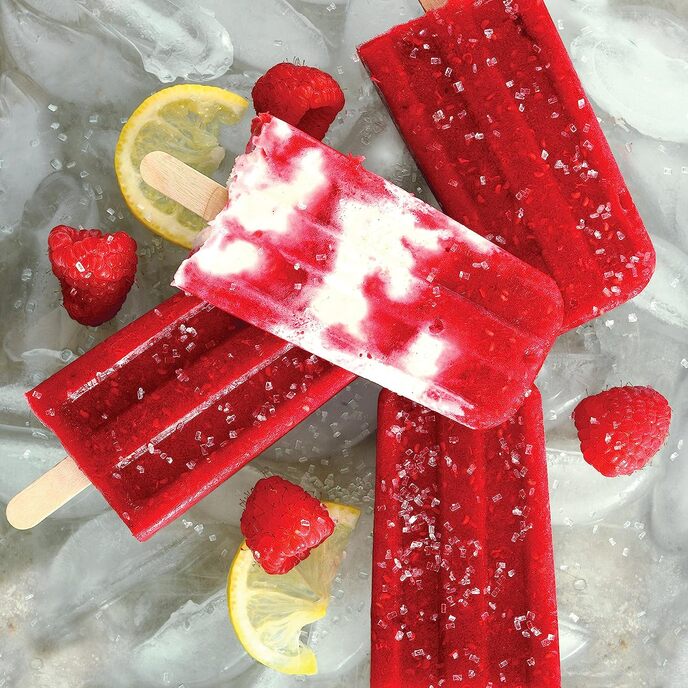
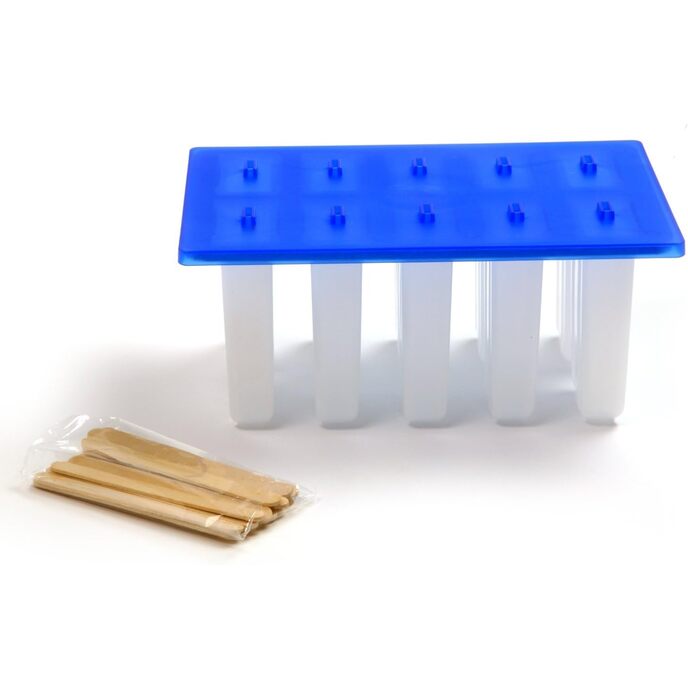
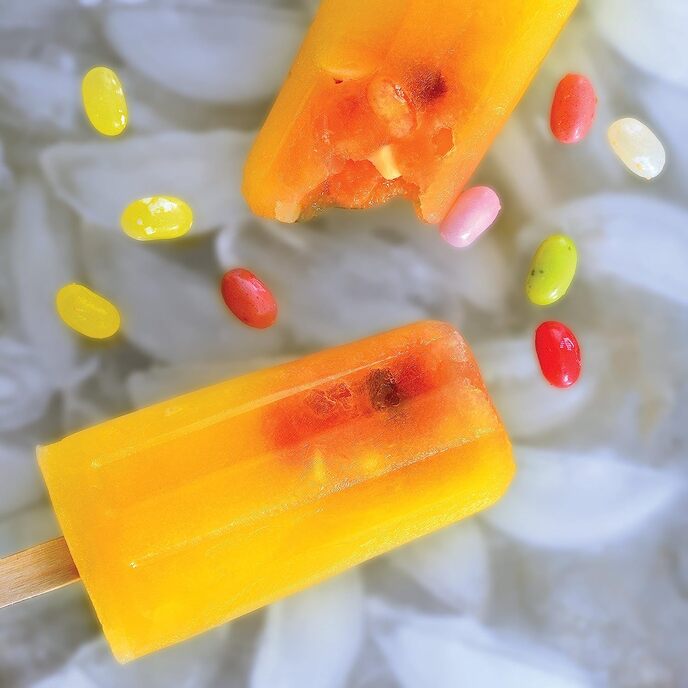
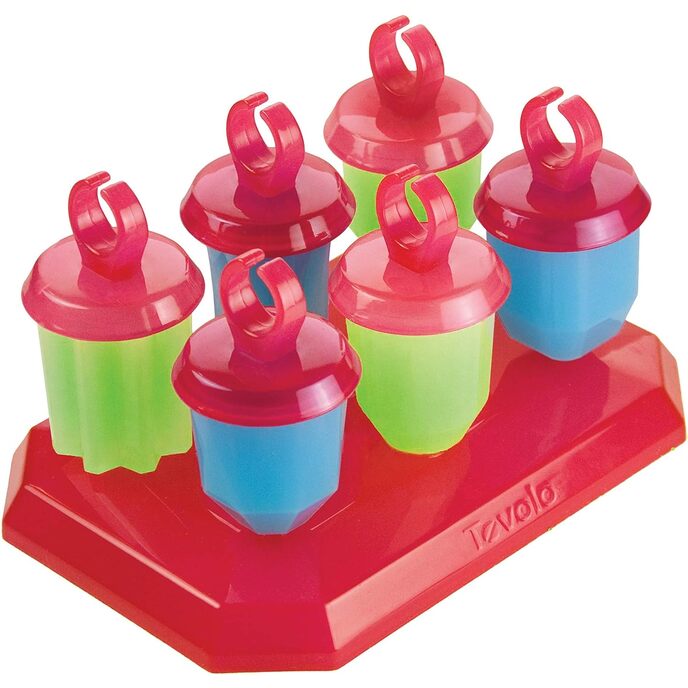
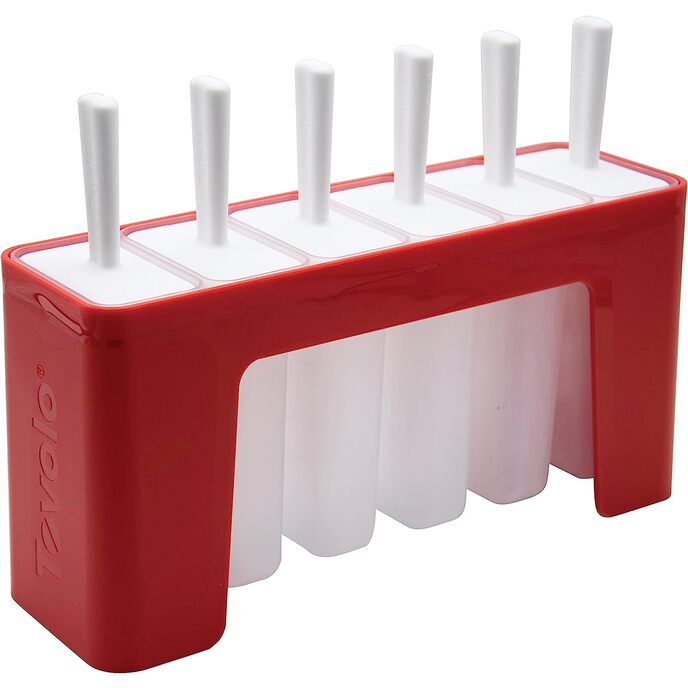
Note (10/5/2012) : The latest version has a blue plastic lid instead of the original slotted aluminum lid. The new design is intended to hold the sticks better, vertically, and indeed people do seem to say that it works as intended. My review is for the original model w/ the aluminum lid, but almost everything still applies.] I love this popsicle maker - it's very well made and easy to use - especially for the price (which seems to vary (sometimes by the hour !) between $11.xx in the Winter to $18.xx in the Summer - I paid $13.xx Winter-2011). And I like the classic popsicle shape it makes and that it uses standard pops sticks. If you use a pops maker with custom sticks/holders, remember that you're going to have to collect them back from everyone later on. I think I've used it 40-50 times by now, and it still looks like new. But some of the low star reviews I've read, it's like they're talking about another product. I haven't had any problems with sharp edges, slots being the wrong size, removing the pops, or cleaning it. A few comments & tips - quite a few here, but all-in-all it's really pretty easy to use: 1. METAL EDGES (* * The new version has a plastic lid - reports are it seems to work ok) : I'm not sure how (a few) people are deciding that there are sharp metal edges. After reading about this I took the edge, and then the corner, and rubbed it up and down my cheek a couple of times - and nothing happened. I am a 6'-2" male, but I'm not made of leather either. You're definitely not going to get a good shave from it by any means. So maybe the manufacturing is better now - I don't know - but I never had a problem with anything sharp - not even close. In general the thing is very well made in my opinion. 2. FILLING : Fill the popsicle mold to about 1/4" from the top - you will see a ridge there where you should stop filling - that will allow room for the mix to expand as it freezes. 3. INSERTING THE STICKS : (This is where you will have a different experience with the new model w/ the plastic lid, so you can pretty much disregard this section) I have not had any trouble with sticks and the size of the slots, as some have remarked. Perhaps pops sticks are not entirely uniform in size ? Just make sure the sticks are dry - if they are wet they will swell and then you'll have problems. The problem some people are having is that there is nothing initially to hold the sticks from veering off vertical before the mix starts to solidify. Wood, being less dense than water tends to want to float up. And if the sticks don't stay vertical, it's hard to get the metal lid off. There are two ways to handle this : --3a : Fill the popsicle maker, start freezing it, then wait about 1 to 1-1/2 hours before inserting the sticks (although that depends a bit on your freezer's temp and how cold the mix is to begin with.) After that time, the mix will have solidified enough that it will hold the sticks vertical. --3b : For a bit of an engineered but slightly goofy solution, clip a 1-1/4" binder clip to the side stick so the little silver handles are horizontal. That way you won't have to remember to insert the sticks later. I found the smaller clips don't have enough weight - the sticks can still tilt off vertical. After the pops freeze, remove all the clips so they don't rust over time. I had photos, above, but there were recently removed as I guess they're not appropriately related to the new version. For any method, insert the sticks - not all the way - but so they stick up about 1-1/4" to 1-1/2". If you put them in all the way there isn't enough to hold on to later on, and when licking/eating them you'll be working around too much stick, so to speak. (Make sure you actually use the aluminum lid - if you don't, the exposed ends of the pops will dry out too much - my current theory anyway.) 4. STICKS For stick supply I just buy the box of 1000 craft sticks from Amazon - the size is right and they always work : Loew Cornell 1021254 Woodsies Craft Sticks, 1000-Piece I'm really not too worried about food grade sticks after backpacking all these years. If you're really concerned you can dunk them in a bleach solution for about one minute. (You know that's how they keep all that packaged lettuce from going bad ?) It depends on the strength of your bleach : you can use 3 TblSpns/gal for 2% bleach, all the way down to 1T/gal for 6%. The chlorine will just evaporate after it dries but it's pretty dilute anyway. (Btw, 1T = 3tsp) Let them dry out before placing in the mold. 5. REMOVING POPSICLES & STORING : Run individual popsicles in the mold under hot water for 10-20 seconds each. If you want to remove more simultaneously, soak for similar time in a vessel of hot water. (Some people have figured out how to remove the actual individual plastic receptacles, but I don't think it's really designed to do that.) Also I'm not too big on the idea of nonstick spray, which is an oil - and oil and popsicles doesn't sound appealing to me. Next, you can wrap them in waxed paper - it's cheap and there is no need to waste a non-biodegradable petroleum product like plastic wrap. Some people then store them in ziplocks; I use a tupperware type container. 6. CLEANING : I don't use the dishwasher - I have a 3/4" dia. bottle brush which works great for cleaning - quick & easy. 7. RECIPES : Remember, your sense of sweetness is much weaker for frozen things like popsicles. So your recipes will need to taste much sweeter at room temp for them to seem about right when frozen. 8. EMULSIFIER - Guar Gum : Almost all recipes will benefit from using an emulsifier (this is true for ice cream as well actually). An emulsifier ensures that the ice crystals formed will be smaller, thus the popsicles will have a MUCH smoother texture. Without one you will find most pops have a texture of compacted snow balls. I use Guar Gum powder which I get at a local health food store, but it's also available from Amazon. There are other emulsifiers like Xanthan gum and Arrowroot (or Agar-Agar but that costs a lot more). Guar & Xanthan are typically used for ice cream and popsicles. For anything besides Guar I'm not sure of how much to add, but it's prob. similar to Guar. For Guar use 1/2 to 1 tsp. per quart - if you use too much the pops will be gooey or slimy. Some recipes require the lower amt. - e.g. strawberry mixes. I'm tending to use the lesser amount now. It can be hard to mix in - so mix in slowly and use an egg beater or blender. And mix only for a bare minimum or you can get froth. One trick is to mix it in a small portion, then pour that into the larger portion. Pouring it through a strainer can remove some of the froth that can develop. And don't let it sit mixed in for hours or it really will get too gooey. I rarely make pops without it - it REALLY helps. **6/15/2012 - I just heard on NPR this afternoon . . . Guar is used big time in fracking . . . prices going up. Weird. You made it to the end - I do have a life and have to get back to it so . . . Good luck - it's fun !
Scritto da: lewko
Professional Quality if you are Careful
You can make professional quality popsicles with this mold but it's not brain-dead easy. Professionals add their own sticks and bags. No ice cream stand asks for the sticks back after you are done licking them. You also need space in your freezer for a 6" by 8" by 6 (or 7) inch high mold (height depends on how far you push the sticks in.) Professionals also have a few other tricks but you are going to make your own tricks. My popsicles came out perfect the first time I used this mold but when I changed fillings I had to make some adjustments. Overall I love it. Here are my observations: Pro: The shape is classic and you can make ten at a time. Any home refrigerator can make 30 popsicles a day even if it takes 4 or five hours to freeze. You can make popsicles so delicious you will be glad you can make 30 a day. At the end of this review I will reveal my lucky pop recipe. Con: There is no instruction or recipe book. It can be a challenge to remove the popsicles. You need to read Amazon reviews to get tips on how to use this mold. Comments: I have used at least four types of the "stick in lid" popsicle molds. I keep them to use up any extra filling when I am making the Norpro pops. The popsicles are just as delicious in any type of mold. I was missing the stick/lids for many of my molds so I started using plastic spoons, and finally wooden sticks.There are many tricks for making the sticks stay in the middle, but the Norpro has a lid with stick guides. You put the sticks in one at a time, but you want to take the lid off all of the sticks at once. Problem #1: The lid gets frozen to the sticks, the pops, and the mold. Solution #1: Spray the lid and mold with a little spray oil (like Pam) before filling and don't fill the mold all the way to the top because ice expands when it freezes. Also be careful not to let the filling slop around and get on the lid while you are loading it in the freezer. To remove the pops first run only the lid (not the mold just yet!) under some water and pry the lid up on the narrow sides. If it is stuck in the middle, push a thin fork or spoon handle under the lid from the end. (Avoid using a knife so you don't scratch the lid.) If the pops start coming out you can either pull them all the way out or wiggle the wooden sticks to loosen them from the lid. I have had all of the sticks stay frozen to the lid pulling all the pops out of the mold at once. Problem #2: The pops don't come out of the mold or are partially broken in the mold. Solution #2: Warm the outside of the mold with your hand, or immerse the entire mold in a pot of water. Perfect pops depend on the consistency of the filling, the temperature, and how far the stick is pushed in. You have to move fast when the conditions are perfect because the pops are warming up constantly when you remove them from the freezer. If you push the sticks in all the way the pops stay together better, but your customers don't have much stick to hold while eating. Problem #3: The stick comes out but the filling stays in the mold. To be honest, this almost never happens to me but it has a few times. A similar problem is when most of the pop comes out but the tip breaks off and stays in the mold. This second case happens often with certain fillings. Solution #3: The problem is due to the consistency of the filling, which is partially dependent on the temperature. If it is too warm the ice will melt and not stay on the stick. This is usually the problem when the stick comes out completely. When this happens I just push the sticks back in and put the mold back in the freezer for half an hour or so. You don't want the lid on when refreezing because you want to take them out of the molds quickly while they are still frozen hard. This also works sometimes when the tips break off right at the end where the stick ends. Pam sprayed in the molds really helps a lot because it makes the mold slipperier than the stick so the filling stays on the stick. Another trick is to let the popsicles warm up a litle which seems like the opposite of what I said before. The idea is to have the filling at the right consistency to slide out of the mold easily. I also soak the sticks a little before inserting them, but I haven't seen any difference when I left out that step. The popsicle filling in the molds is the chef's prerogative to eat immediately or you can spoon it out and put it in a custard dish in the freezer. My Lucky Recipe for Strawberry Pops: Put 1 pound of strawberries (fresh or frozen) in a blender and puree. Dissolve 1/2 cup sugar into 1 cup of milk and add to blender. Puree until smooth and pour in molds. This exact recipe works for bananas, pears, pineapple, mixed berries.
Scritto da: Paris
It's ok
It was a little more difficult to unmold than I anticipated. I did run it under warm water to release pop.

Prodotti correlati

Scopri il nostro network internazionale

Spediamo in 28 paesi, oltre 200.000 prodotti. Resta aggiornato, iscriviti alla newsletter.

Shopping Cart