Nastro per canne fumarie ad alta temperatura 3M, nastro sigillante per alte temperature fino a 600 gradi, kit isolante per interni con nastro termosaldante in rotolo da 15 piedi

Brand:3M

3/5

29.34

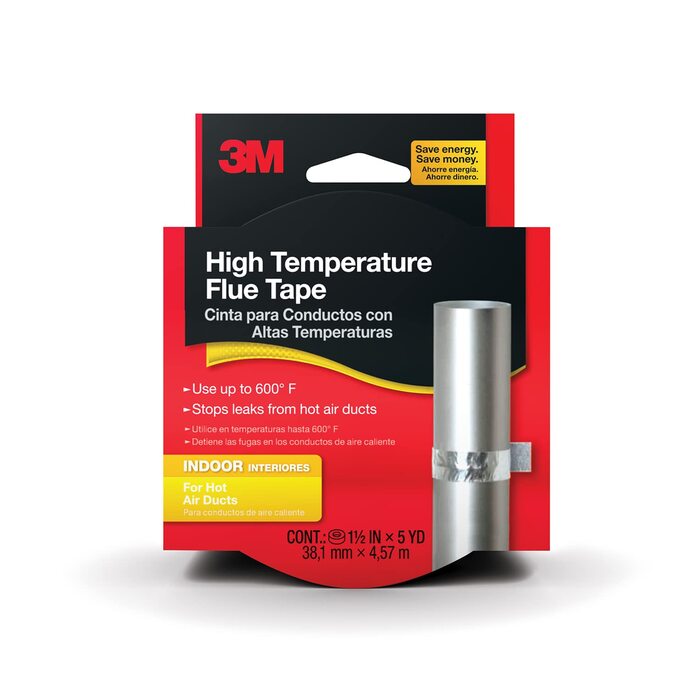
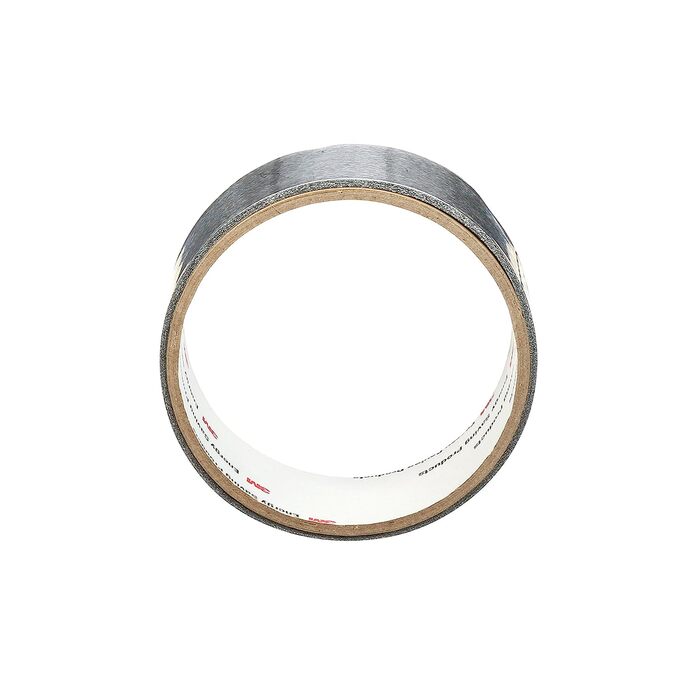
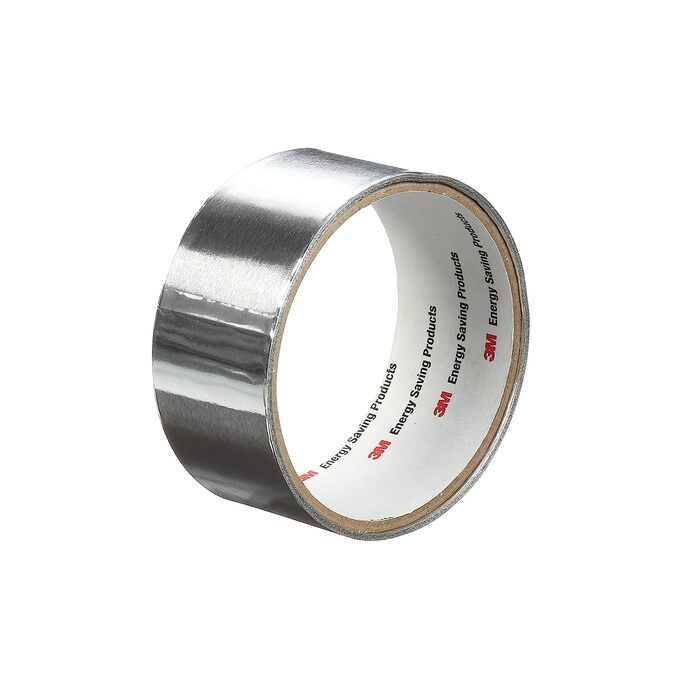
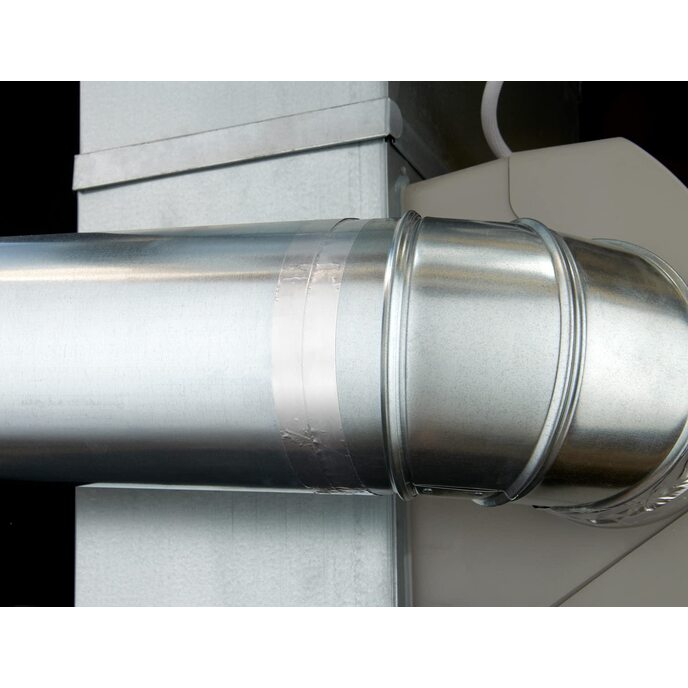
Il nastro per canne fumarie ad alta temperatura 3M blocca le perdite di aria calda nel punto in cui iniziano: le giunture dei condotti di riscaldamento. Il nastro della canna fumaria è resistente al calore fino a 600° F.

Rotolo da 1,5 pollici x 15 piedi. Resistente al calore fino a 600 gradi Fahrenheit. Prodotto negli Stati Uniti. Misura 1,5 pollici x 5 yd. Aiuta a ridurre i costi di riscaldamento. Resistente al calore fino a 600 ° F. Arresta le perdite dai condotti dell'aria calda.
Brand 3M
Color Silver
Country of Origin USA
Is Discontinued By Manufacturer No
Item model number 2113NA
Manufacturer 3M
Number of Items 1
Product Dimensions 180 x 0.1 x 1.5 inches; 0.8 Ounces
Size Heat-Sealing Tape
Special Feature Heat Resistant

3

7 Review
5 Star
56
4 Star
15
3 Star
9
2 Star
5
1 Star
15

Scrivi la tua recensione

La tua mail non sarà pubblicata. Tutti i campi obbligatori sono segnati con*

Scritto da: R. Kuschner
The shortcoming is the tape
I've been using this for 3 winters now in a place I rent because there is zero insulation in the place and the windows seem to have been bought at the dollar store. These work pretty good to keep out the drafts and keep the heat in, but is all dependent on the tape. I have had to buy the tape separately on one occasion because it must have dried out in a hot storage place and would not peel correctly. It seems to stick much better on tile than it does sheetrock. If it starts peeling off, use some packing tape to keep it going until the Spring. PREP: For my crappy windows, I clean them good and the duck tape every possible opening and gap. This helps a lot. Then clean around the edge of the window frame where the tape will go. Allow it to dry fully, use a hair dryer to dry it. At first you will go mental with the tape. Make sure you clean the area around the window very well and allow to dry! Peel off one side of the tape and apply to the wall. Keep the backing on the tape until you are ready to apply plastic. You will need to over lap the tape in the corners, so you will need to peel off just enough of the backing to overlap. Cut your plastic so you have over lap. Remove tape backing (already applied to the wall). Hold the plastic from the top (both ends and pull tight). Apply to top and work your way down the sides pressing against the two-sided tape. Try to apply it as tight to the tape as possible. If you mess it up, you can pull the plastic off, but I would avoid it if possible. After the plastic is in place, heat the edges where the tape is with a hair dryer and push down (you can use a credit card or something, just careful not to rip the plastic.). Wait a few minutes and heat the plastic with a hair dryer to tighten it. Depending on the hair dryer, you may have to get right on up on it. Be careful not to make it too tight like a board, it should have a little flex, just tight enough. Trim the loose edges with an exacto-knife or scissors. Hope this helps somebody.
Scritto da: D
Easy-peasy installation
Let me start off by saying I did this installation while wearing in a tall cam boot. You know, one those bulky removable casts. Quite cumbersome but this needed to be done so..... When I first removed the film from the box I was confused because it appeared already fully unfolded and it only measured 44" wide. I called the 800# and almost immediately reached customer service. The young lady I spoke with suggested I apply small pieces of tape on both sides of a corner and pull. Low and behold it opened up and I felt a bit foolish. I thanked her and returned to the installation. First I cleaned around the window with alcohol and a towel. I used a second towel to dry it, and then allowed it a few minutes to completely air dry. I applied the double-sided tape around the entire window frame except for the bottom. I folded the film in half to find the middle and started from the top center working my way out to the sides, stopping occasionally to prevent the film from catching the tape on the sides. Then I worked one side at a time from the top, using one hand to pull the film while using the other hand to seal it against the tape. I then took the bottom of the film and folded it up and taped it with scotch tape in a few places to hold it out of the way before applying the last strip of double-sided tape to the bottom of the window frame. Then, starting at the center I pulled the film down a few inches at a time until it attached completely across the bottom and made the final run with my fingers along the edge. I went around the entire window pressing the film against the tape to insure I didn't miss anywhere. Last but not least I used the hair dryer to shrink it. This is the only place I had issues but I believe it's because the wind was blowing briskly and causing the film to stretch while I was applying heat so it wouldn't allow it to shrink. I'll try it again later once the winds calm down and hopefully the heat will work then. I may need a stronger blow dryer. I can't speak to the dependability of the tape or whether or not the film holds up against heavy winds since I just installed it, but it's pretty windy right now and so far so good. If any issues arise I'll update. Update: It's been exactly 60 days and I'm glad to say that the film and tape have both held up great! Usually the wind rips right through the room and because they were so strong the day I installed it I wasn't so sure it would hold up. In fact, every time I tried to use the blow dryer to shrink the film the wind would stretch it out. I finally realized that between the heat and wind blowing in it was allowing it to expand so I stopped and did it once the winds died down and the blow dryer worked as it was supposed to and shrunk the film. As always the winds have been a beast this year but neither the film nor tape have budged. Now I can't help but wonder how much heat and a/c has been escaping through this particular window and I'm seriously considering leaving it up all year around, if for no other reason but to see just how much my electric bill is affected. I'll probably completely change it out every 6 months just to make sure it doesn't weaken with age or fall apart from sun exposure. I highly recommend this product, not only for your comfort but for cutting down on your bills as well!
Scritto da: murray anderson
Be patient...a little planning and this film works great.
This film worked just fine , I think if people had trouble with it coming loose from the adhesive strip it is only because not enough pressure was applied first to the strip and then not enough pressure to bond the film to the strip. Running your thumb slowly with lots of pressure on the strip then on the film when it was applied worked very well and was done quite quickly.
Scritto da: Torsten
Overpriced for it's performance.
For starters, there is very little tape on the roll for what it costs - I had assumed that was due to the premium adhesive performance. After some testing, I have found that at 220C (428F) the adhesive is releasing. Not what I expected from such an expensive premium product. In parallel to this, the environment also tested locally sourced foil tape made by another brand "N". This tape is MUCH less expensive... There were no adhesion failures with this tape at 220C. Either I received counterfeit tape, or the 600F claim is not related to the adhesion characteristic.
Scritto da: john allison
Not recommended for wood fired flues
And that’s a shame as it’s a wood fired flue that needs it! Wish that was more obvious on the ordering page!
Scritto da: Olatunde O
It works.
Good weather sealing tape.
Scritto da: Deborah
Transparent weather sealing tape
I used this tape to seal around my large front window was not sealed properly after installation I think, to prevent ants from getting in has been very effective, very easy to use

Prodotti correlati

Scopri il nostro network internazionale

Spediamo in 28 paesi, oltre 200.000 prodotti. Resta aggiornato, iscriviti alla newsletter.

Shopping Cart