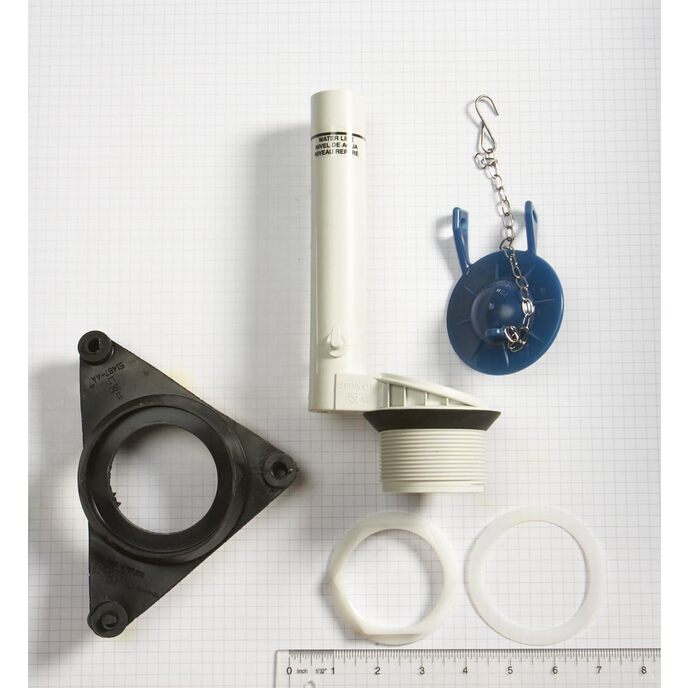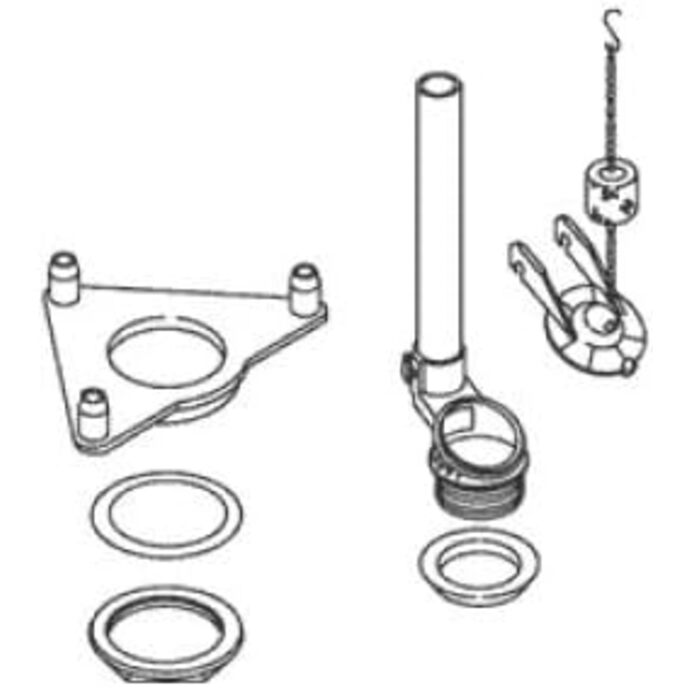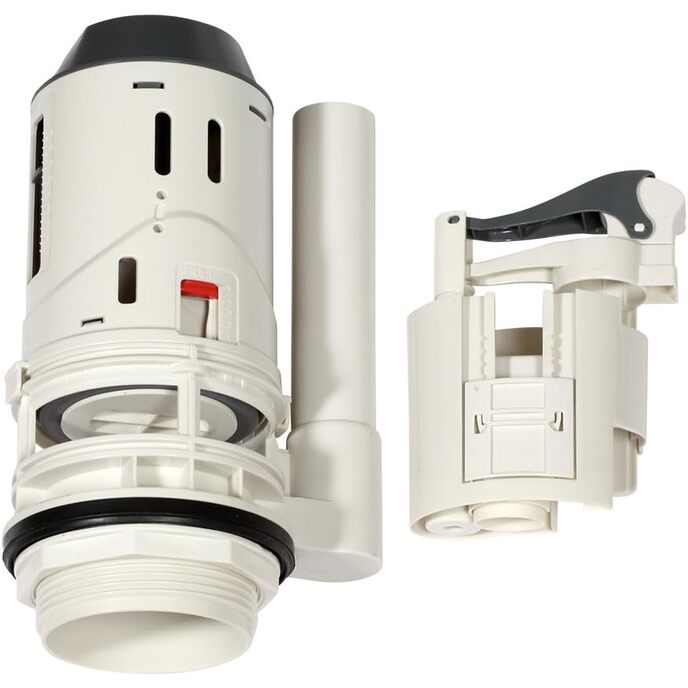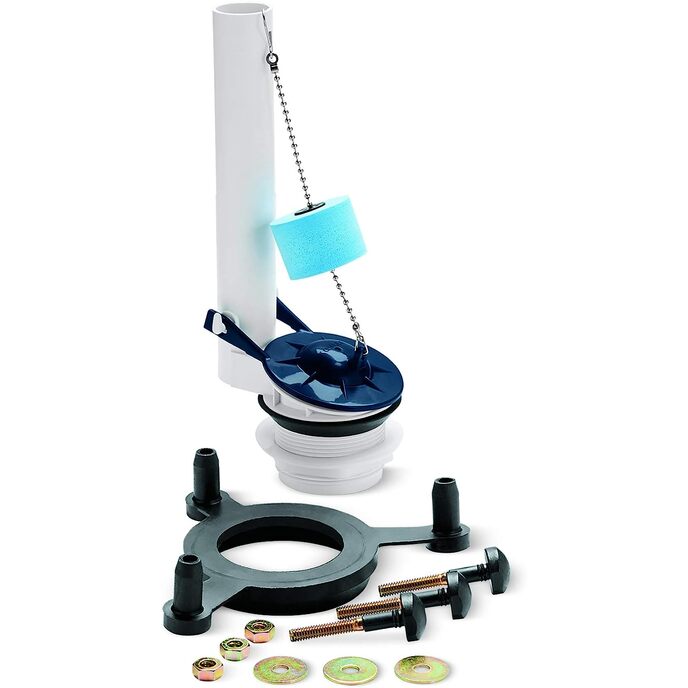
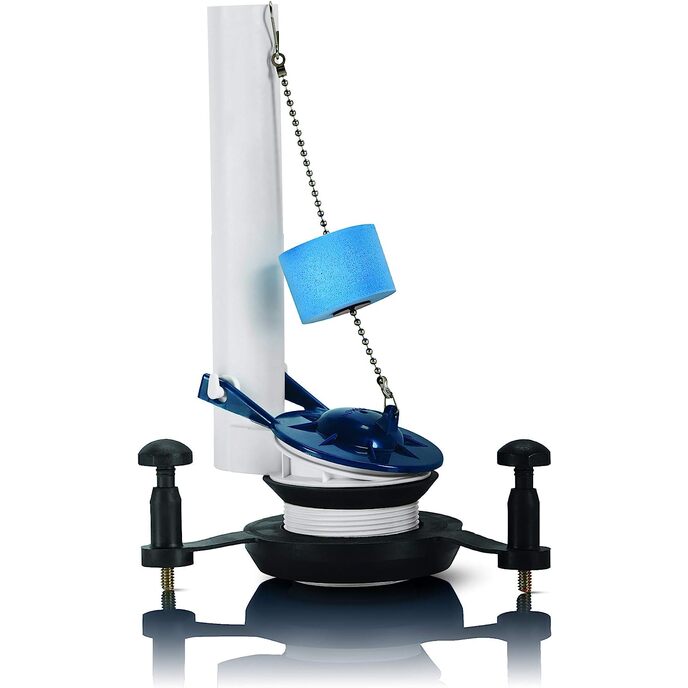
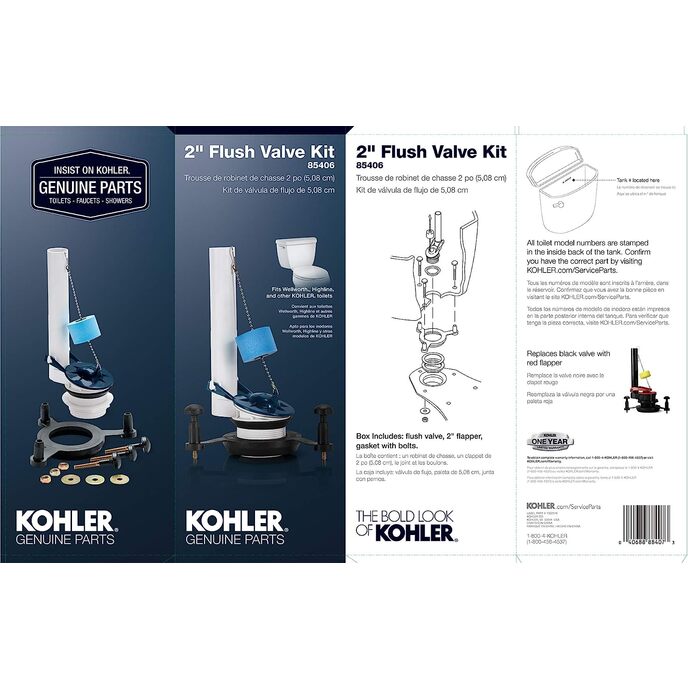
Sostituisce la valvola di scarico nera con valvola rossa. Sostituisce anche il codice articolo 84246. Ottimizza le prestazioni di scarico del WC. Include valvola di scarico, 2 flapper, guarnizione triangolare e bulloni. Gruppo valvola di scarico per WC Wellworth, Highline e vari altri servizi igienici KOHLER. RICAMBIO ORIGINALE KOHLER.
EAN: 0040688884073
Categories: Strumenti e miglioramento della casa, Impianto idraulico grezzo, Parti della toilette, Valvole di scarico per WC,
| Brand | Kohler |
| Inlet Connection Size | 2 Inches |
| Inlet Connection Type | Barb |
| Item Dimensions LxWxH | 11 x 6.5 x 3 inches |