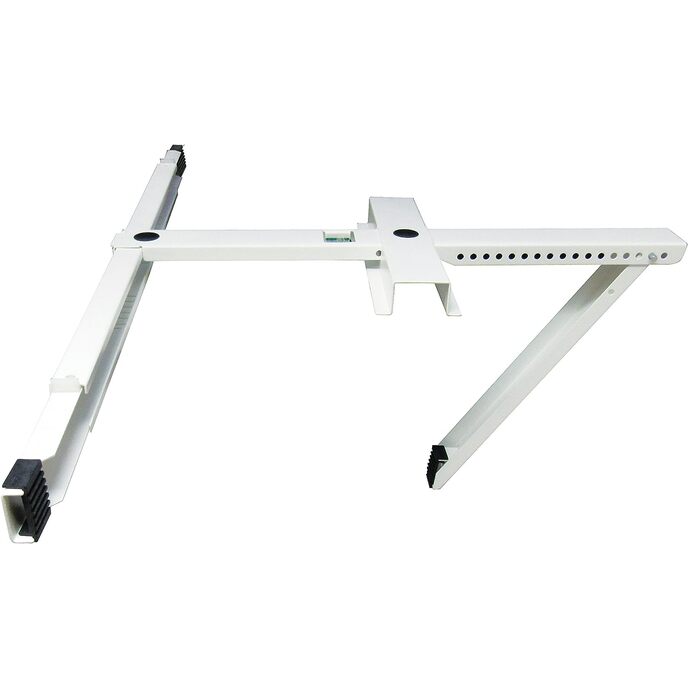
So, I’m A fairly strong 6’2” fella’, The buttons (metal objects built into the male half of the frame, designed to lock the unit) were very difficult to press in, and they need to be pressed in several times for each side, one at a time. When installing it is my opinion that you should plan on lifting the unit into the window and removing it several times to be sure it is secure, I do not have it tied, or secured. It is secure simply by gravity and proper installation, if you live where there is earthquakes please be safe and secure the unit additionally after the unit is securely installed. (I do not work for this company I’m just sharing my tips as free Intillectual information ;) ) When properly installing you want the final position of the bracket to be secure and lined up with the design of the AC you have purchased. Initially, after removing the screen and cleaning the windowsill, I connected the two halves of the bracket and set it in the center of the windowsill. (be sure your AC is level for 24 hours before turning it on otherwise you will permanently damage the unit, I have the physical strength to keep the unit level with ease, you might not be able to, if you need to tilt the unit during installation, do not start the unit for a few hours! You might break the AC!) With the bracket in the window I experimented with the angles of the bracket and how loose it was and how tight it had to be for me to feel like it would “grab on”. I decided to tighten the unit at a level, then tilt it outward (the AC manual said it needed to lean outside to drip condensation) The buttons are difficult to push and the unit is also difficult to tighten. I tightened each side not at a time with a thimble (for sewing) to push the metal buttons in without pinching my skin or the gloves I tried using. Maybe my unit was slightly defective. But I felt like it was more difficult than necessary, but it will probably show, in longevity. I applied the “feet” for the walls, (x3 one outside two inside) , they have a slight uneven taper, this adds to the tightness of the bracket when utilized. I applied a small amount of force to cause the unit to tighten as well as lean SLIGHTLY outward, There were 4 rubberized feet included, to put on the bracket and absorb vibration/ add grip. I put the two along the curve outside and two along the windowsill, when I set the AC unit onto the bracket I found a natural way for the unit to stay aligned with the window, while having all four rubber feet supporting the AC unit. It is not symmetrical! It was actually not as straightforward as it seems I was constantly tweaking and adjusting the rubber feet until the unit was satisfactorily seated (also adjusting the unit and bracket to its final position). I pulled the unit off and put it back on multiple times to adjust the rubber feet as well as to move the bracket closer to the side of the window I wanted it, I used the rear of the unit as my primary guide as well as closing the window loosely onto the AC so that it would have a tight fit and the bracket would be properly adjusted to the unique size/shape of the AC unit. You’ll want to adjust the feet along the curve of the bracket to give the unit a nice “level” position that is secure but also leaning down and out to drain any water. After I got the unit to it’s ideal position; I shaped the foam (included foam works well when cut with razer blade or exacto knife) meticulously around the base of the AC and the bracket and in the windowsill . After I did this I removed the AC and tightened the bracket and added the (included) plastic guards for the outside and inside parts and put it on the inside (toilet paper down) and on the outside (toilet paper up) to encourage the tightness, they are slightly tapered, I gently applied force and wiggled the bracket to be sure it was in the correct place, Sealing the foam tightly using tape it seals out the heat very well, it cuts very nicely and I made very intricate shapes (I worry about bugs). My AC unit is 18.4 inches wide.