Draw-Tite 118400 Connettore T-One per Honda Ridgeline

Brand:Draw-Tite

3.5/5

105.88

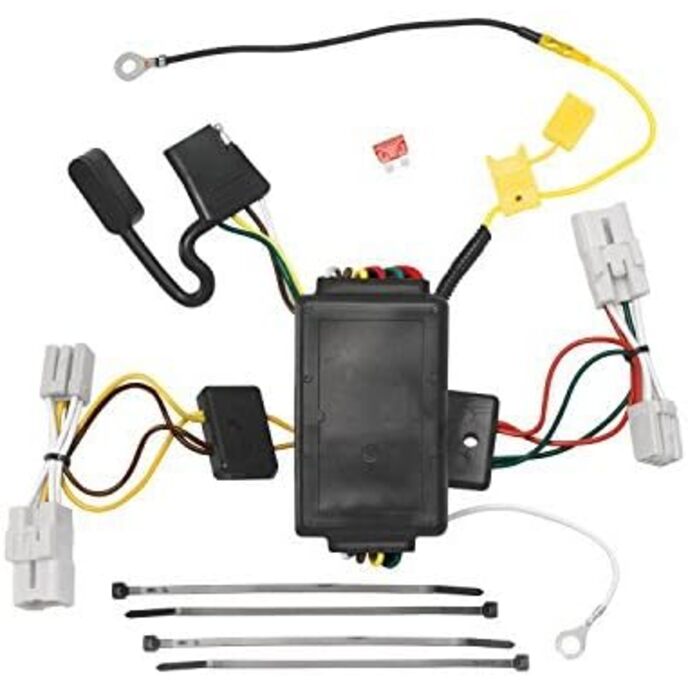
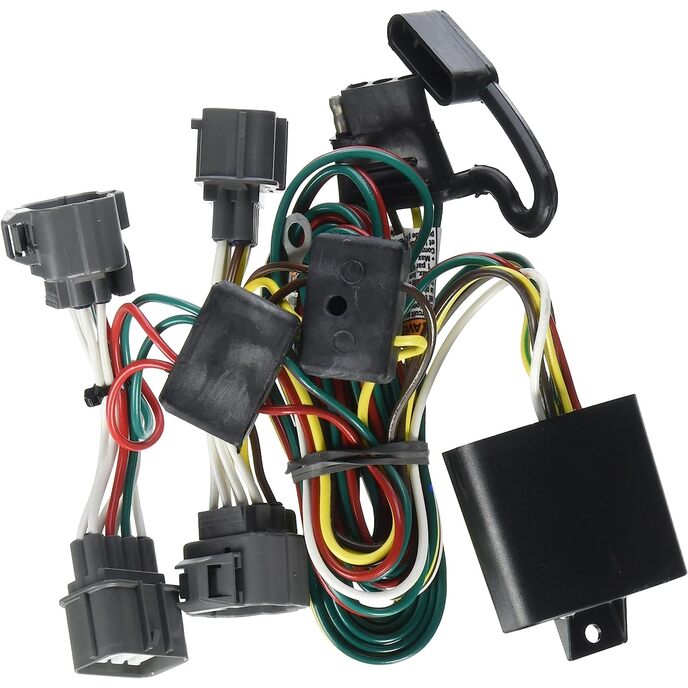
Gruppo connettore T-One con convertitore protetto da circuito

Include convertitore dove necessario. Nessun taglio, giunzione o nastratura dei cavi del veicolo. Costruzione solida, resistente alle intemperie, monoblocco. Installazione facile e veloce. Aspetto di fabbrica.
Brand ‎Draw-Tite
Customer Reviews 4.4 4.4 out of 5 stars 66 ratings 4.4 out of 5 stars
Is Discontinued By Manufacturer ‎No
Item model number ‎118400
Item Weight ‎1.1 pounds
Manufacturer ‎Draw-Tite
Manufacturer Part Number ‎118400
Model ‎118400
OEM Part Number ‎DJSK118400
Product Dimensions ‎3.98 x 3.63 x 8.88 inches

3.5

8 Review
5 Star
76
4 Star
6
3 Star
10
2 Star
4
1 Star
4

Scrivi la tua recensione

La tua mail non sarà pubblicata. Tutti i campi obbligatori sono segnati con*

Scritto da: Ramon Monteiro
Perfect
Perfect part, easy to install
Scritto da: M&PK
Easily Installed. Works. OEM Style Connectors.
This review is for the Tow Ready 118400 T-One Connector for a Honda Ridgeline Truck. The instructions are good, easy to follow and understand. Installation takes 30-40 minutes from start to finish. The only things you need are a 10mm socket, and 1/4" socket and a screwdriver / nutdriver for these sockets. A drill with a 3/32" bit is also required. You remove the tailight housings (two screws each, the housings then pull straight back, not to the side). Once the tailight is out of the way you disconnect the driver's side wiring and connect the Tow Ready "spliced" into the driver's side connections. You are not cutting any wires, just putting the Tow Ready connector hooked between the male and female connectors. The only advice I can give is to have an old wire hanger or some long forceps to help get the passenger's side connection and the hitch connections fed down through the hole below the dirver's side tailight housing. This is hard to describe, but once the tailight housing is removed, you can see two "hole" down through the bumper, you'll be able to see daylight. One "hole" is close to the outside of the truck and drops down behind the bumper and rear wheel. The other "hole" goes more to the middle of the truck. This second hole makes the "run" of wire shorter. But this "hole" or opening is smaller than the outer one. I had to use a pair of forceps (or long skinny needle nose pliers) to help coax the connections through the opening. Once I got the wires to the passenger side, I was glad I used the middle opening on the driver's side to thread the wires through; I could not get the passenger connectors up through the first, more medial, opening on the passenger side, and had to run the connector all the way past the muffler tail pipe and up through the outer hole. That used up a few more inches of wire, and those inches did matter. I don't know if there's enough wire to go from outer opening to outer opening. I used more tie wraps than were included in the kit, and I tie-wrapped the wires to the hitch. The "body" of the wiring harness has double sided padded tape which is supposed to hold it in place somewhere on the driver's side, under or behind the tailight housing. I don't know if the tape will be strong enough, but I didn't see any where to tie-wrap it. The lights on the truck worked, and the trailer immediately worked as well.
Scritto da: Robert
EASY and Fast
Background - I wanted to add tow capability to my Honda Ridgeline RTS, but I did not want to pay the dealer to add the specialized Honda kit and since I decided to go with a non-Honda tow hitch assembly, the Honda kit had a connection housing that I could not easily mount. Research - I looked at several other kits, but this kit's installation video looked the easiest. It was also recommended by a local hitch supply company and is the one that they use. Installation - Installation was very easy. Removing the two tail light assemblies was easy, with Honda doing an excellent job of design to make these easily accessible by simply dropping the tailgate. The kit is pre-assembled, so it was just a matter of connecting the new wire harness to the existing wiring, routing the wiring, sticking the control module to the interior well using the supplied double-sided tape, and zip-tying the excess wiring. One small drill hole is required behind the left turn signal (it is hidden by the Honda light housing) to install the grounding screw, but that is the only time you need anything but a screwdriver and a nut driver (For the Honda light housings' removal). Tools - Socket set, Screw driver, Drill, Metal bit, Dikes(for cutting off excess zip-tie material) Extras - The purchase of some extra zip-ties for getting the wires up and away is a good idea. Three are included, but I wanted, and needed, more. I also used a Velcro tie strap to keep the pigtail and connector tucked away when I am not using it. Time - The entire install was done in fifteen minutes by two people working together. Function - Everything worked just as promised. Quality - The quality of this kit was excellent. Summary and Recommendation - This is a good solution to get you towing. I would recommend this kit to a friend.
Scritto da: Uhdeman
2008 Honda Ridgeline
Honda ridgeline 08 used to upgrade 7pin. Oi vey I went through 8 different harnesses trying this and that. Hope this helps someone. Black blue and yellow. Black on 7pin direct to battery with 40amp fuse. Blue from 7 pin goes to blue on brake controler no fuse. Plug this 4 pin into 4 pin on 7way. Yellow goes to reverse light only if your are using a trailer that has brakes that lock on reverse(check yours)otherwise like me who has older setup brakes on popup just cap it off. On controller; black goes to battery with a 30amp fuse, blue is already connected No fuse to blue on 7pin, and red goes to 4pin square plug that is at top of brake pedal. I looked at grey factory 4pin plug up by steering colum and matched that harness wires with ones on controller harness to see which one to tap into. Can also use a multimeter a d see which one gets power when brake compressed. I recall bottom right grey and black but dont quote me.
Scritto da: Andrew Grant Wright
It works!
First time ever installing a trailer wire harness on a vehicle. I like how this connects directly to the OEM harness. Very clean. AND....it works! So many times you see vehicles where it is a shoddy installation and barely works. This is the complete package. Really happy with the purchase.
Scritto da: Gary A. Baker
Great connector but harder than explained - Honda Ridgeline 2013
I watched the online video and it seemed simple, you know, 10 minutes and done - included instructions are generic and basically useless. The first part was easy, disconnect the lights and plug in the connector. Next drop the wires through the opening below the driver-side; this gets hard because by the time you realize maybe you went the wrong way as there are several openings, it's gotten hard. Anyhow, I came through the logical opening, the bigger one, but by the time I tried to stick the module to the hitch - per instructions, the wires were short, so I ended up finding a flat surface and sticking it and using wire wraps to hold it even more. The product itself seems great and appears well made. I'd buy it again but not the quick job expected, however, if I did it again it would probably take the 10 minutes.
Scritto da: JEH
Quick and easy install.
The wiring fit right into the tail lights with no problems.
Scritto da: GrowerServices
Easy to Install
The harness was easy plug and play. Works perfectly.

Prodotti correlati

hot

Scopri il nostro network internazionale

Spediamo in 28 paesi, oltre 200.000 prodotti. Resta aggiornato, iscriviti alla newsletter.

Shopping Cart