Halo H7RICT, 6" Alloggiamento CI Rimodellamento Alloggiamento Tensione di linea 120 V Ciascuno

Brand:HALO

3.4/5

54.12

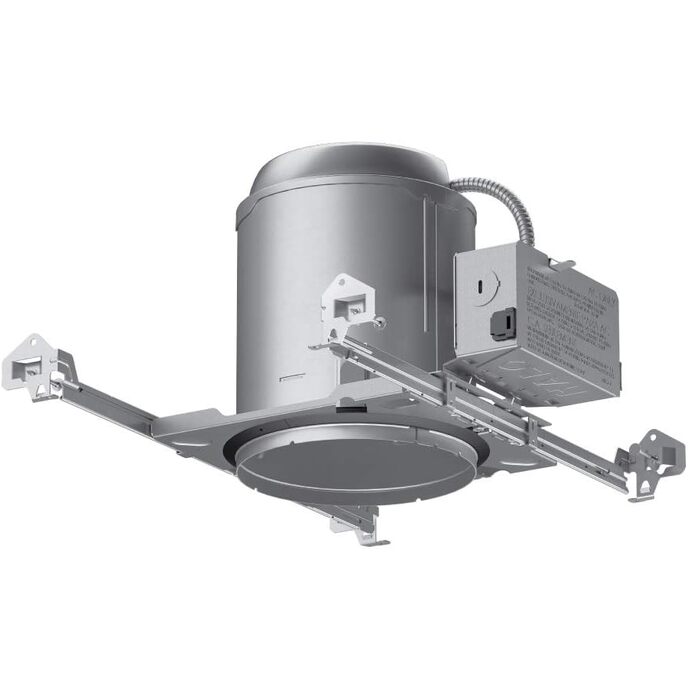
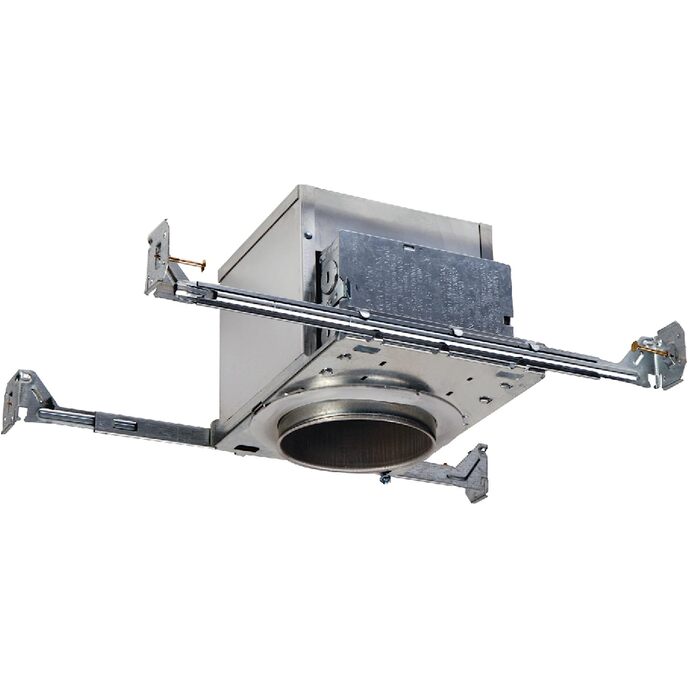
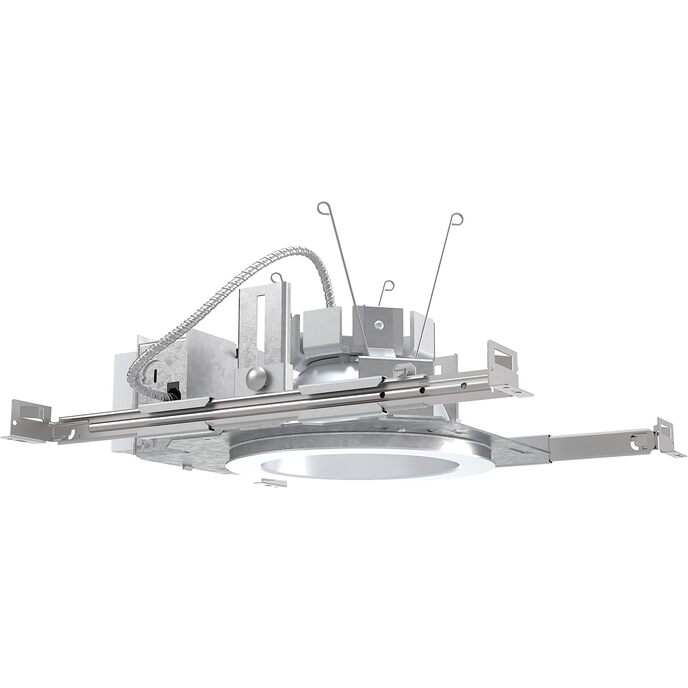
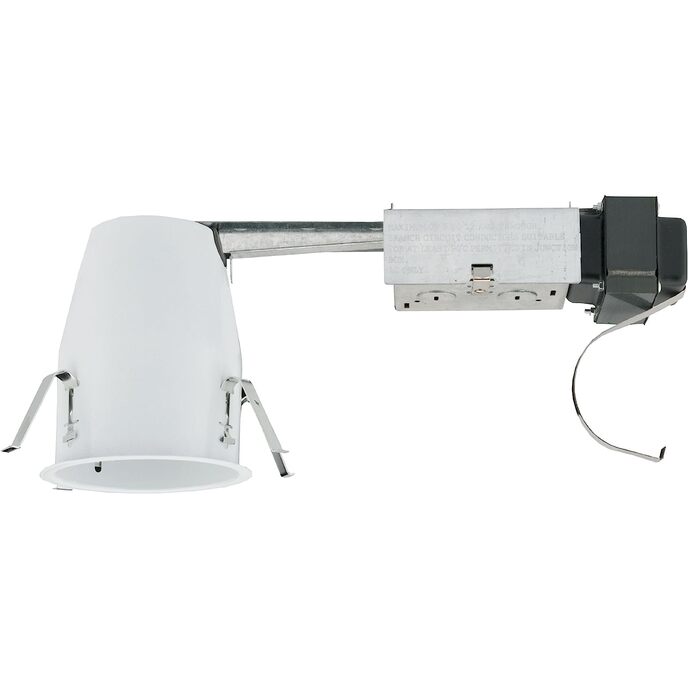
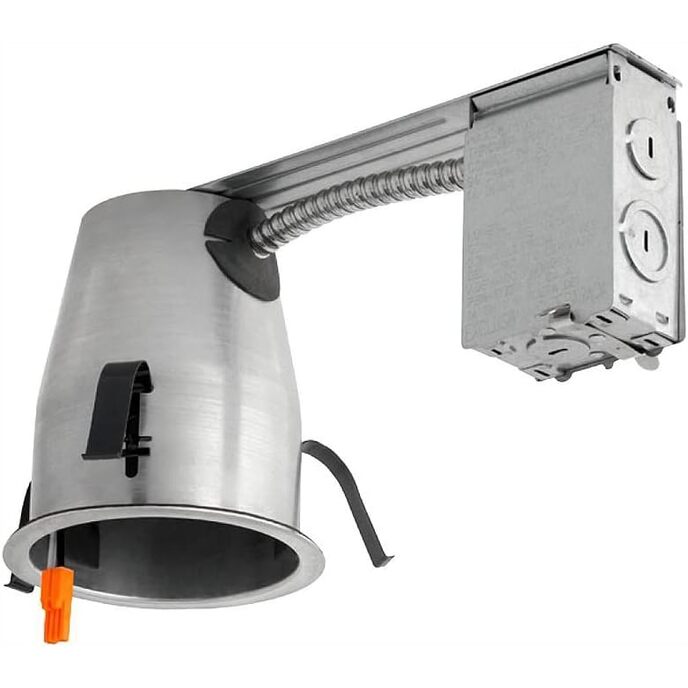
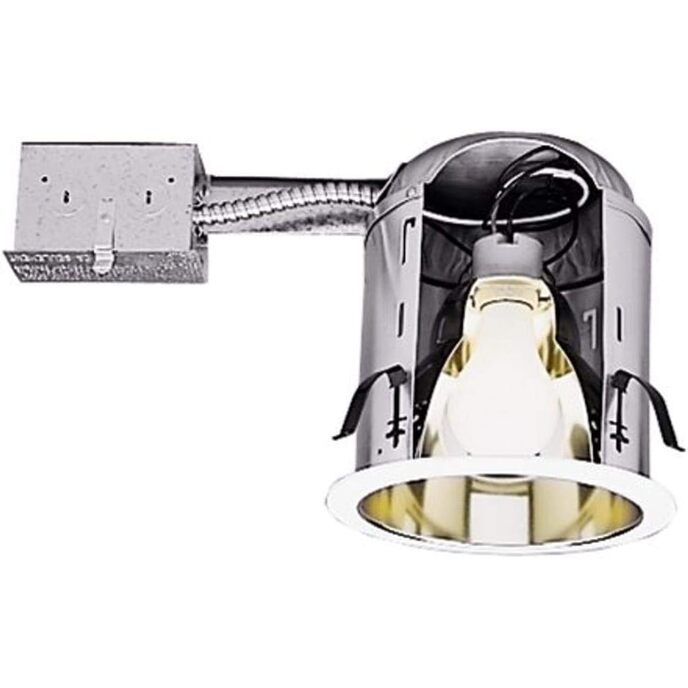
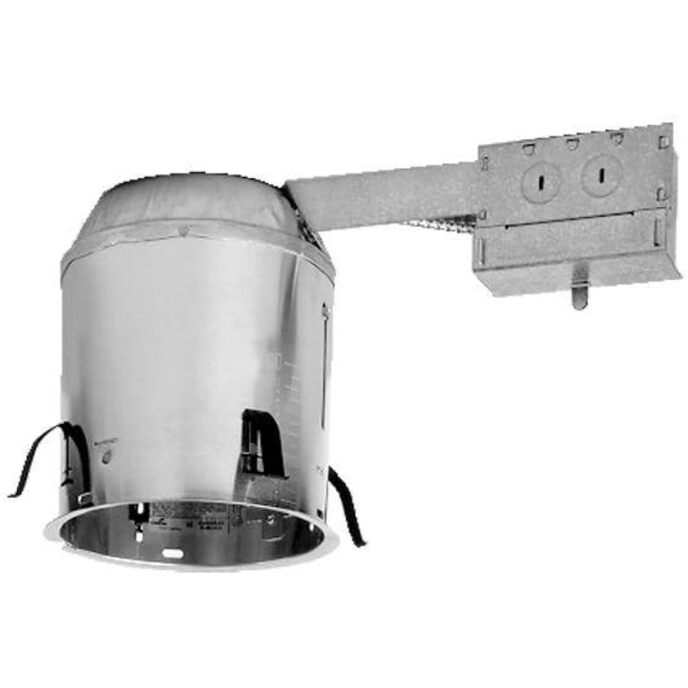
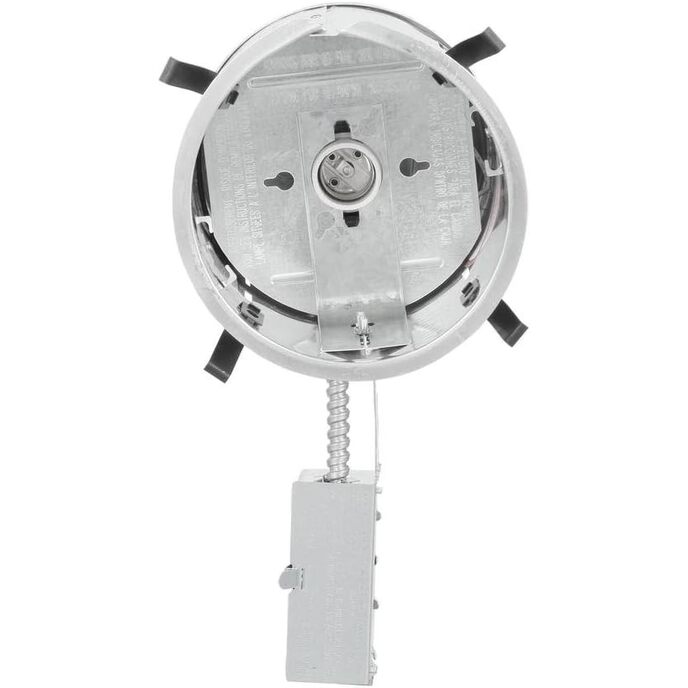
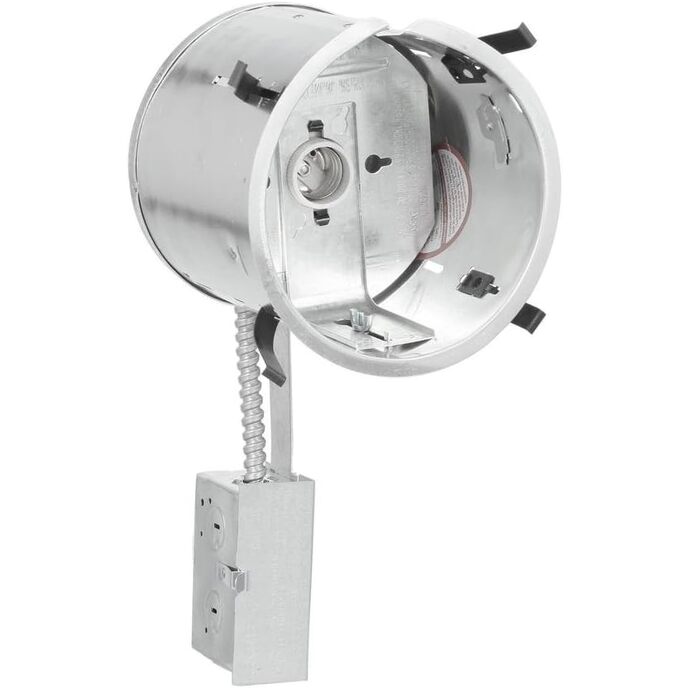
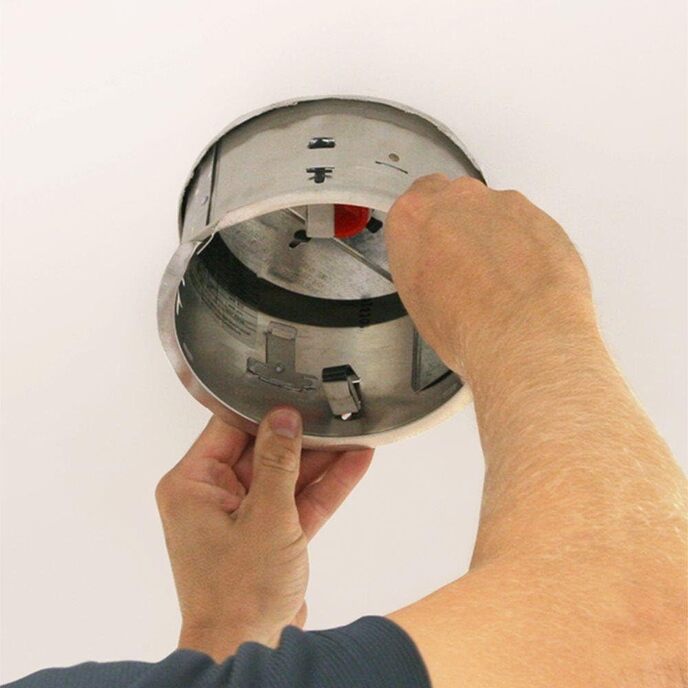
DESCRIZIONE DEL PRODOTTO HALO H7RICT è un alloggiamento per controsoffitto isolato realizzato in alluminio e progettato per applicazioni di rimodellamento in cui l'alloggiamento sarà a diretto contatto con l'isolamento del soffitto. Il protettore termico integrato integrato fornisce una protezione positiva contro la sovrapposizione. Questo alloggiamento da incasso dispone anche di una staffa per presa regolabile per garantire un posizionamento corretto e coerente della lampada. L'altezza di 7-1/2 pollici dell'alloggiamento consente l'uso in strutture con travetti da 2 pollici x 8 pollici e una flangia integrale fissa l'apparecchio contro il soffitto. 4 clip di rimodellamento fissano l'alloggiamento e si adattano allo spessore del soffitto da 1/2 poll. a 5/8 poll. Approvato UL e certificato CSA, H7RICT semplifica qualsiasi progetto di rimodellamento. AMAZON.COM L'H7RICT è l'apparecchio da scegliere se si desidera una soluzione di illuminazione ad apertura più ampia (sei pollici) da utilizzare in un progetto di ristrutturazione in cui l'alloggiamento entrerà in contatto diretto con l'isolamento. L'H7RICT offre una certa flessibilità nell'illuminazione e nell'aspetto. L'ampia varietà di finiture disponibili con la famiglia di alloggiamenti da incasso H7 di Halo consente di abbinare l'arredamento, la finitura e gli effetti di illuminazione desiderati. Inoltre, la staffa per portalampada regolabile consente di utilizzare una gamma di diversi tipi di lampade. Halo semplifica l'installazione con una serie di funzioni utili. L'H7RICT può essere installato da sotto il soffitto utilizzando le clip di rimodellamento incluse (queste possono ospitare materiali del soffitto da 1/2 e 5/8 di pollice). La presa in porcellana a posizione fissa con guscio a vite fornisce un posizionamento uniforme della lampada e tre connettori Quick Connect eliminano la necessità di dadi separati. Disponibile con una varietà di opzioni di rifinitura (vendute separatamente). Classificazione UL per luoghi umidi, passanti e contatto diretto con materiale isolante e combustibile; certificato CSA; Classificazione IP. Per una versione non classificata IC di questo prodotto, vedere H7RT di Halo.--Josh DettweilerCosa c'è nella confezioneCustodia con apertura da sei pollici

3 connettori Quick Connect eliminano la necessità di capicorda separati; 4 molle di rimodellamento fissano l'alloggiamento e si adattano a soffitti da 1/2 pollice e 5/8 pollici. Da utilizzare con lampadine/lampade a incandescenza da 120 volt (non incluse, vendute separatamente). Luogo umido approvato per un uso sicuro se utilizzato con luci da incasso selezionate. L'alloggiamento incassato classificato come contatto isolante (IC) può entrare in contatto ed essere ricoperto di materiale isolante. Remodel incasso può illuminare l'alloggiamento, ideale per installazioni sotto il soffitto per coloro che hanno un accesso limitato o nullo.
Batteries Included? ‎No
Batteries Required? ‎No
Brand HALO
Brand ‎HALO
Certification ‎Csa, Ip, Ul
Color Silver
Color ‎Silver
Country of Origin ‎Mexico
Customer Reviews 4.4 4.4 out of 5 stars 247 ratings 4.4 out of 5 stars
Domestic Shipping Item can be shipped within U.S.
Finish ‎Nickel
Finish Type ‎Nickel
Included Components ‎HALO H7RICT, 6" Housing IC Remodel Housing 120V Line Voltage
Installation Method ‎Ceiling
International Shipping This item can be shipped to select countries outside of the U.S. Learn More
Is Discontinued By Manufacturer ‎No
Item Dimensions LxWxH 14.25 x 6.75 x 7.75 inches
Item Dimensions LxWxH ‎14.25 x 6.75 x 7.75 inches
Item model number ‎H7RICT
Item Package Quantity ‎1
Item Weight ‎0.28 Pounds
Item Weight ‎4.5 ounces
Manufacturer ‎EATON
Material Aluminum
Material ‎Aluminum
Part Number ‎H7RICT
Product Dimensions ‎14.25 x 6.75 x 7.75 inches
Size ‎Each
Style Art Deco
Style ‎Art Deco
Type of Bulb ‎LED
Voltage ‎1 Volts
Warranty Description ‎2 yr product warranty.
Wattage ‎50 watts

3.4

5 Review
5 Star
68
4 Star
14
3 Star
10
2 Star
4
1 Star
5

Scrivi la tua recensione

La tua mail non sarà pubblicata. Tutti i campi obbligatori sono segnati con*

Scritto da: LongIsland Retiree
Good value ,glad i read reviews
the template is a tiny bit small so i cut just outside the line i traced and it fit snugly ......the clips were a pain to set but worked.....all in all very pleased
Scritto da: Dan
Great housing cans for the price and install is a breeze
Great can for the price and ease of installation. I've installed 16 of these between my house and my parents house with no issue. The cans come with a template that is simple and easy to use for cutting. Has a small drill bit sized hole to use for centering which is useful in the template. Perfect size if you get a hole key to drill the holes for the cans. I used a drywall saw for 4 of these when I first started and it took forever ( 10-15 mins or so each can between trimming it for proper install etc). Bought an adjustable hole saw for about 30 bucks and it was beyond worth the investment for installing these (to do 4 it took about 10 mins) so I recommend going this route from the start. The template has instructions for installing the cans and the wiring too for reference if you're unsure about it. Be sure you measure though and assure that you have enough space above the can and around it. It sits sort of high and the junction box sticks out a bit. Wiring is super simple which is a time saver and not the usual strip and use an electrical wire nut. You pop open the junction box and you'll have a ground exposed copper wire, and a white and black wire. Pop open one of the slots on the box for your wiring to come into the junction box using a flat head screwdriver. Then strip your 14/2 NMB wiring and you push it into this connector on the wires from the can itself. There are 4 holes in each total, one is used by can wiring and then the others you can use (doesn't matter which hole) for the wiring from the ceiling to light to switch or what have you. Just make sure the wires are pushed in deep enough so they lock into place and won't come undone. You can see how much wire you get into there though since the casings are clear. Put all the wire back in the junction box and put the cover back on and wiring is done. Installing with the clips at first was tricky. Best way I've found is if you remove the black clips before pushing the can into the ceiling then you can push it in with very little to no resistance. With the clips installed at first I kept having a difficult time with the clips catching on the drywall. The can will sit flush and pretty solid into the ceiling as long as you cut the hole right (another reason the drill piece is worth it). Then just pop back in the retaining clips and push them into place. Make sure you don't have any crud or insulation under the clip when installing it because that will make it very difficult to properly lock in the clips. You can use a skinny flat head screwdriver to push insulation and stuff out of the way through the tiny slots. When you push and lock in the clips by hand they should be pretty stiff. To do a final lock though you need a flat head screwdriver again and have to push into the clip which has a small divet in it. Push it up and it firmly locks into place. I think a lot of people miss that part but it's in the directions too for installing. Push back the insulation on top of the can and you're done. Cans are not 100% air tight but I don't know of any that truly are that I've seen. You can use a small bit of fire block spray foam to insulate if you want for true air tightness due to the small slots in the can. As a whole though they are pretty tight, if you toss the insulation back on top of them then you're safe (especially if you have blown in insulation). Do this after installing everything though and be sure it's the fire block spray foam and not the typical spray foam in a can which is highly flammable.
Scritto da: Sal Fanale
Good product, easy to use and cheap.
I used several of these to add recessed lights to my home while I was remodeling. I definitely qualify as a DIY type of person so keep in mind my perspective of this item is based on my personal experience in my house as I completely rewired it myself, not as a professional electrician who may have experience with different brands of remodel housings. Over all it was pretty easy to install. The first thing is you need a 6-1/4" hole. I already had a good 6" holesaw so I assumed it would fit for this housing, but after cutting the first hole it was perfectly clear that was a no go. A quick trip to my local HD and I found an adjustable hole cutter with the electrical tools. It is exactly like this one sold on amazon (http://amzn.com/B001PI8S6O) but it was only ~$35 dollars. I have normal 1/2" sheetrock and that cheap cutter had no problems. Once I had the right sized hole this remodel housing slipped right in. Before I mounted it to the ceiling however, I pulled the 14/2 romex down into the room so I could work on the wiring from below instead of being hunched over in the attic. These housing have a nice connect end which makes it VERY easy to wire, practically without tools. You will need to install a wire clamp connector where you remove the knockout, but that's standard electrical code. Once I was inside it was just a matter of striping about 1/2" of the neutral and hot lines and pushing them into the connector. The nice thing is they give you a 6 port connector so you can EASILY daisy chain the next light in series without any additional work. Then I popped the cover back on and eased it into the hole I already cut. The last step is to push the spring clips up and in so they lock the housing against the sheetrock. I found this to be the one weakness. You have to put a good bit of pressure on the clips with a screwdriver to make sure they seat in the little notch, but not too much because the can itself is VERY thin metal and will easily bend if you over do it. After the first light, I got the hang of it and the remaining 4 went in easily. I deducted one star overall because the housing itself does feel pretty flimsy. Especially the arm connecting the can to the Jbox. Inside there is a standard light bulb socket, which my LED remodel trims addressed with another connector. Being IC rated it couldn't have been easier to install since I didn't even have to move my insulation, just pushed it up. Its nice they are airtight also to help prevent heat from leaking into the attic. All and all, a pretty easy process for the home DIY/first timer and probably even easier for a professional. The price was right too!
Scritto da: Deleena N
Just What I Needed
Swapped some old CFL (with ballast) new-construction (hammered into the roof joists) housing for these to use dimmable LEDs. Works just as intended.
Scritto da: Total Tech
As good as I remember
I've used these cans for about 20 years. They have changed very little in those 2 decades. Its been a while but I needed one remodel can for a remodel/addition project and the can worked out great. Nice metal quality. Not all banged up in shipping (although the box Amazon used was enormous). Wire connectors and strain relief worked nicely.

Prodotti correlati

Scopri il nostro network internazionale

Spediamo in 28 paesi, oltre 200.000 prodotti. Resta aggiornato, iscriviti alla newsletter.

Shopping Cart